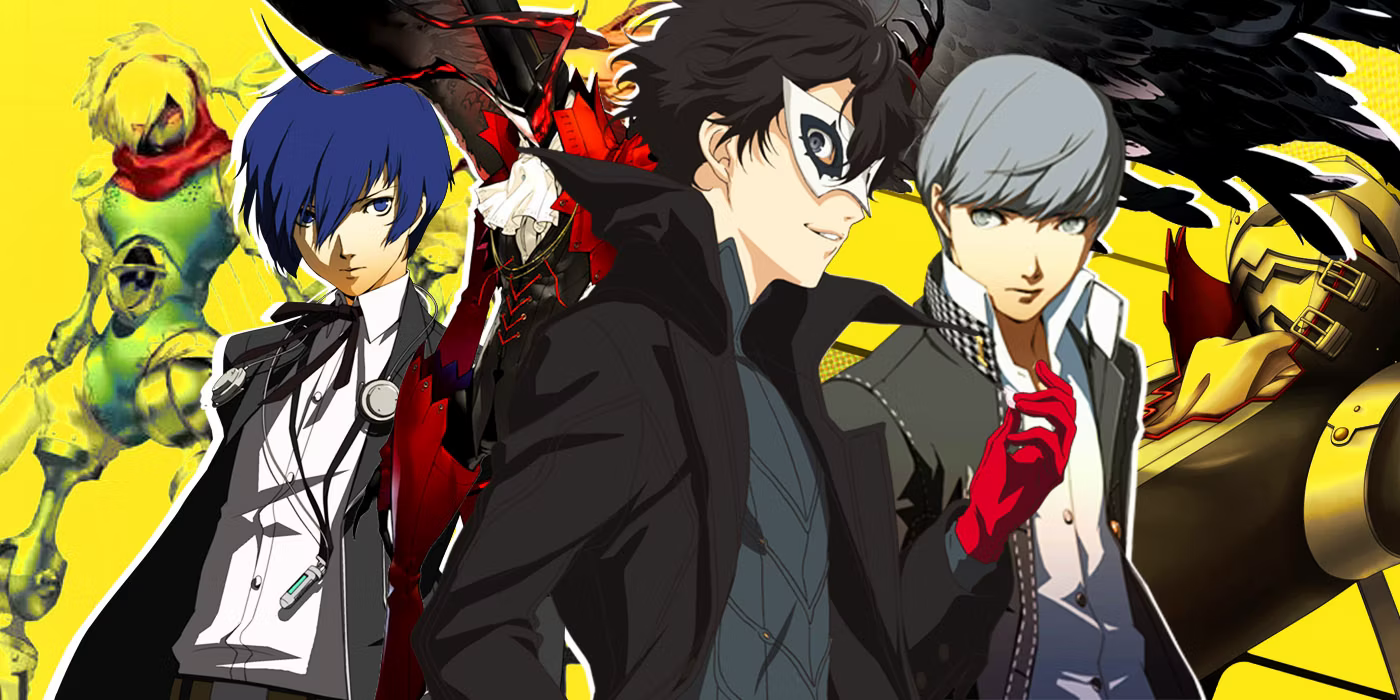
In September 2022, the game NieR: Re[in]carnation introduced a crossover event with Persona 5 Royal (P5R). I was impressed by the crossover story and added P5R to my watchlist on Steam. However, it was until June of the next year that I finally had the time to have my hands on it. And later, I completed other Persona series available on Steam: P5S (Persona 5 Strikers), P5T (Persona 5 Tactica), P4G (Persona 4 Golden), P4AU (Persona 4 Arena Ultimax) and P3RE (Persona 3 Reload). The first two of the Personas aren’t available on Steam so this blog won’t discuss them, but hopefully the experience will help readers clear them. One thing to note that P4AU is a huge exception among all Persona games. P5X (Persona 5: The Phantom X) is not included in this guide because I haven’t played it yet.
Element System
Persona series features the Element System that all attacks are classified into different elements. All Personas will have different affinities for all elements. The affinities are:
- Weak: If anyone is hit with an attack of certain element of which the Persona or the Shadow is weak, the damage is increased and will be struck down. The game will prompt “Weak” once the hit is landed. You need to try to strike weakness on enemies. Once a weakness is struck, the attacker will be granted a “one more“, allowing the attacker to make another move.
- Normal: While being hit with this element of attack, the damage is neither increased nor decreased.
- Strong: While being hit with this element of attack, the damage is decreased. The game will prompt “Resist” once the hit is landed. You need to avoid using this element against such enemies unless you are using AoE skills.
- Null: While being hit with this element, no damage is taken. The game will prompt “Block” once the hit is landed. You need to avoid using this element against such enemies unless you are using AoE skills that cover more than one enemy not blocking this attack.
- Repel: While being hit with this element, the damage will be dealt back to the attacker. The game will prompt mirrors to demonstrate the repelling effect. If both sides repel this element of effect, the attacker will instead block the repelled attack. You need to avoid using this element against such enemies unless you are using AoE skills and your Persona can at least nullify this element.
- Drain: While being hit with this element, the damage will be instead healing the victims. The game will prompt certain number of HP that victims are healed. You need to avoid using this element against such enemies unless you are using AoE skills and all such enemies are already full in HP.
In P4G, if the attacker can drain this element while the victim can repel this element, the attacker will recover HP by draining the repelled attack.
The Almighty attack is an exception to above affinities as all characters are Normal to them. The game will not prompt anything other than the damages taken. The “All-Out Attack” is also a type of Almighty attack. However, certain enemies will take significantly less or more Almighty damage than others, so watch out for them. For example, the “ultimate enemies” (for the sake of spoilers, I’ll not mention their names here) in Persona games “resist” Almighty attacks. They will receive significantly less damage from Almighty skills and All-Out Attacks.
Attacks, in terms of source, can be roughly classified as Normal attacks, Item attacks, Physical Skills and Magical Skills.
- Normal Attacks are mostly physical, but can be magical if the equipped weapon is special.
- Physical Attacks, including Normal Attacks, can sometimes land a critical hit on enemies if the enemy does not nullify, repel or drain such element. Physical Skills will cost HP in percentage for player-side characters, not enemies. Victims that suffer from critical hits will be struck down. In other words, you are encouraged to use Physical Attacks if your enemy’s weakness is hard to hit.
- Magical Skills will cost SP in flat number for all characters.
- Certain Magical Skills can insta-kill enemies. Weak to insta-kill elements can increase the probability to be killed, while Strong against to insta-kill elements can increase the probability to evade.
- Certain Items can deal magical element attacks against enemies. For non-insta-kill elements, the damages dealt are fixed. Attack and defense power do not affect the damage. Weak, Normal and Strong affinity do not affect the damage.
You don’t know your enemies elemental affinities at first unless you have hit them with certain elements before. You can infer enemy affinities by judging what attacks they have used. Remind you that this is not 100% correct, but a good guess anyway. The 100% correct method is to check comprehensive guide online about affinities of any enemies in the dungeon.
- If the enemy used Non-Almighty magical attacks, they might resist, nullify, repel or drain such element. However, it might be weak on the counterpart element. Counterpart element is always your prime choice to try hitting weaknesses.
- Fire and Ice are counterparts to each other.
- Electricity and Wind are counterparts to each other.
- Nuclear and Psychokinesis are counterparts to each other.
- Light/Bless and Dark/Curse are counterparts to each other.
- You can’t tell the affinities of physical elements on your enemies. Try to use normal attacks on them to reveal it before using Physical Skills. But if they have repelling passive skills like “High Counter”, it is recommended just to use magical skills.
- Bosses typically have no weaknesses and can resist, nullify, repel or drain certain elements. Feel free to use Elemental Break skill in order to let your DPS teammates deal major damage.
P5R and P5S
In P5R and P5S, attacks can be classified as Melee, Gun, Fire, Ice, Electricity, Wind, Nuclear, Psychokinesis, Bless and Curse. The Melee and Gun attacks are Physical Attacks. All characters can use Physical Attacks from both Normal Attacks and Gun Attacks. Other attacks are Magic Attacks.
P5T
The element system described above does not work in P5T. In P5T, attacks can be classified as Melee, Gun, Burn, Freeze, Shock, Sweep, Vortex, Hypnosis, Dizzy, Despair, Sleep and Forget. In addition, the elements in P5T do not have affinities.
- Melee: When you are one square next to your enemy, you can use Melee attack. This will send your enemy a few blocks away and you will stand on that block.
- Gun: If your enemy is within the range of your gun, you can use Gun attack.
- Skills: If your enemy is within the range of your Persona, you can use Persona skills to attack them. Unlike normal attacks, Persona skills ignore barriers and can always inflict damage.
- Burn: This skill will inflict burning ailment. Enemies will lose HP in their turns.
- Freeze: This skill will inflict frozen ailment. Enemies will lose ability to move and attack in next turn. However, defrost can happen earlier if the enemies are hit before their turns.
- Shock: This skill will inflict shocked ailment. Enemies will lose ability to move and attack in next turn.
- Sweep: This skill will send enemies flying away from you.
- Vortex: This skill will send enemies flying and draw them together.
- Hypnosis: This skill will send enemies flying near you.
- Dizzy: This skill will cause enemies to move randomly in next turn.
- Despair: This skill will reduce enemies’ movement range and increase movement range for party.
- Sleep: This skill will cause enemies unable to move and attack in next two turns
- Forget: This skill will cause enemies unable to attack in next two turns, but will also cause them to recover some HP and SP.
P4G
In P4G, attacks can be classified as Physical, Fire, Ice, Electricity, Wind, Light and Dark. All attacks other than Physical are Magical Attacks. Light and Dark can only be insta-kill attacks.
P3RE and P3P
In P3RE and P3P, attacks can be classified as Slash, Pierce, Strike, Fire, Ice, Electricity, Wind, Light and Dark. Slash, Pierce and Strike attacks are Physical Attacks. All characters have their fixed element of Normal Attacks. Other attacks are Magic Attacks.
Building Teams
In all Persona games, you will unlock characters as the story progresses. Unlike your teammates, you, as the protagonist, will be able to wield multiple Personas. Typically, you will need to make your team cover all elements in order to hit any possible weaknesses. It is recommended to have a physical attacker with high critical rate in order to strike down enemies with no weaknesses.
You can recall skills for your teammates if you need a change of style. However, it costs time in the calendar.
- In P5R, you can bring your teammate to the church in Kanda in order to recall skills.
- In P4G, you can bring your teammate to the hot spring and choose talking about the past to recall skills. You can only do so when your teammate is standing outside the gas station with a scooter.
- In P3RE, you can bring your teammate to Be-Blue-V shop in order to recall skills.
- In P3P, there is no way to recall skills for your teammates. Your teammates have fixed skills. You can’t choose what skills to keep as your teammates level up.
P5T
P5T is an exception to above rules. In P5T, there’s only three affinities against any elements of incoming damages. All characters can use one Sub-Persona. In other words, Joker isn’t special anymore and doesn’t have to participate in all quests.
- Weak: The characters or enemies are in open-space. They will take full damage and be struck down once hit.
- Resist: The characters or enemies are in half cover, or are in full cover but not hiding in a correct direction. They will take reduced damage and will not be struck down.
- Block: The characters or enemies are in full cover of a correct direction. They will take no damage.
- If elevated from ground, incoming gun attacks will be resisted.
- Persona skills can ignore elevations and covers. If your enemies is not taking cover, they will be struck down by Persona skills even if you are on lower elevation.
- In DLC chapter, standing in wrong ground color will make you weak against incoming attacks even if you are taking cover. Standing in correct ground color will make you resist incoming attacks even if you are not taking any cover. Being hit once will change the color of the ground.
In P5T, you need to prioritize movement and attack ranges because flexibility can significantly reduce the number of turns you need to clear quests. In other words, Mona and Fox are your prime choices, and Noir is your worst choice (even though she is the greatest Technician in P5R). In addition, Fox’s Persona Goemon can unlock a strong passive skill “Auto-Masuku” that can further temporarily increase movement range for all allies from the beginning of the battle for three turns. When you purchase or forge weapons, prioritize the attack range, then consider the attack power and elements.
Your main goal of the beginning stage in every playthrough, including NG+, of P5T is to level up as soon as possible because levelling up is an important way to earn Growth Points. You will equip your team with Sub-Personas with both skills of “Knack for Conflict” (innate skill from Persona Dionysus) and “Efficiency Aficionado” (innate skill from Persona Tam Lin). In other words, both Dionysus and Tam Lin must have both “Knack for Conflict” and “Efficiency Aficionado”. The third Persona must have “Knack for Conflict” as well. The other recommended skill is “Auto-Masuku” (innate skill from Ardha) in order to temporarily raise movement range for all allies. Use recipe generator to build these Personas with required skills.
Attack Skills
There are various attack skills in Persona series. Here is a list for you to decode their meanings.
- The “agi” spells: All skills with “agi” word deal fire damage on enemies.
- The “bufu” spells: All skills with “bufu” word deal ice damage on enemies.
- The “zio” spells: All skills with “zio” word deal electricity damage on enemies.
- The “garu” spells: All skills with “garu” word deal wind damage on enemies.
- The “frei” spells: All skills with “frei” word deal nuclear damage on enemies.
- The “psi” spells: All skills with “psi” word deal psychokinesis damage on enemies.
- The “kou” spells: All skills with “kou” word deal bless/light damage on enemies.
- The “hama” spells: All skills with “hama” word deal bless/light insta-kill on enemies.
- The “ei” spells: All skills with “ei” word deal curse/dark damage on enemies.
- The “mudo” spells: All skills with “mudo” word deal curse/dark insta-kill on enemies.
- The “megido” spells: All skills with “megido” word deal almighty damage on all enemies.
The skills can have prefixes and suffixes:
- The “Ma-” prefix means the skill is applied on all enemies.
- Skills with no suffix mean that the damage is light power.
- The “-la” or “-ga” suffixes mean the skill is medium power.
- The “-dyne” or “-gaon” suffixes mean the skill is heavy power.
- The “-on” suffixes mean the insta-kill probability is increased.
Supportive Skills
There are various supportive skills in Persona series.
- The “-kaja” spells: All skills with -kaja suffix deal positive effects on allies for three turns. “Dekaja” spell is a very cheap spell that removes all enemies positive effects.
- The “-unda” spells: All skills with “-unda” suffix deal negative effects on enemies for three turns. “Dekunda” spell is a very cheap spell that removes all allies negative effects.
- The “taru” word: All skills with “taru” word will affect the attack stats temporarily.
- The “raku” word: All skills with “raku” word will affect the defense stats temporarily.
- The “suku” word: All skills with “suku” word will affect the agility stats temporarily.
- Charge and Concentrate (or Mind Charge): These two skills will render next physical/magical attack to deal more than double damage. It cannot be negated by “Dekaja” and will not expire unless the battle is over. If your enemies is charged or concentrated, either kill them before their attacks or put yourselves on guard.
- Heat Riser and Debilitate: These two skills will either increase or decrease attack, defense and agility for one target. They can be negated by “Dekaja” or “Dekunda”.
- Rebellion, Revolution and Brave Step: These skills will increase critical rate for three turns. “Dekaja” cannot negate this effect. Note that “Revolution” is cheap but will increase critical rates for all allies and all enemies.
- The “Break” spells: These skills will clear the resistance affinities (Strong, Null, Repel and Drain) of a certain element from all enemies for three turns. However, it cannot negate “Wall” skills.
- The “Wall” spells: These skills will make one ally resist one certain element for three turns. This is useful to protect your allies with certain weaknesses. However, it isn’t necessary in lower difficulties.
- The “-karn” spells: These skills will forge a repelling wall of incoming attack once and won’t expire until the battle is over. Tetrakarn” can repel physical attack once. “Makarakarn” can repel magical attack or ailment once. Almighty attacks can’t be repelled.
To maximize damage (to fulfill some achievements), you will need to:
- Use (Ma)tarukaja or Heat Riser to increase allies’ attack power.
- Use (Ma)rakunda or Debilitate to decrease enemies’ defense power.
- Make sure your agility is enough to land your hits. It does not affect the power, but it is very annoying if your enemies evade your big shots. So if necessary, use (Ma)sukukaja and (Ma)sukunda.
- Use Charge or Concentrate to amplify damage.
- Try to Increase critical rate if you are using Physical Skills. You can use Apt Pupil passive skill and Rebellion/Revolution support skill. In P3RE, you can add “Crit Rate Boost/Amp” passive skills to further increase critical rate. In P5R, there is a unique skill “Brave Step” which can increase all allies’ critical rate and won’t increase critical rate for foes.
- Use a correct element. The target’s affinity should at least be “Normal”.
- Make the DPS Persona have 99 points of either St or Ma.
- Use “Boost” (25% up) and “Amp” (50% up) passive skills to amplify damage. The effects can stack. In P3RE with P5R DLC, you can add “Driver” (75% up) passive to stack even more damage.
- P3RE even has “Single/Multi-Target Boost” (15% up) and “Shift Boost/Amp” (10/20% up) passive skill to further amplify damage.
- P5R has trait system to further amplify damage. For example, “Undying Fury” is the prime choice of Physical DPSes like Yoshitsune.
- If ailment is viable, inflict Rage onto enemies to further amplify damage.
- In P5R, use Fire (Inferno or Blazing Hell) or Psychokinesis skills (Psycho Force/Blast) in order to land a Technical Hit on enraged enemies. The “Universal Law” Trait (Innate Trait from Kohryu) can further amplify Technical Hit damage.
- However, if your opponent is weak against the element you will use to deal Technical Hits, the hit won’t be technical, and thereby the “Universal Law” trait won’t be activated. You should use “Relentless” trait instead or change to another element.
Note that “Relentless” trait only activates for single-target attacks on weaknesses. - You need to read “Knowing the Heart” book so that you will be able to deal Technical Hits on enraged enemies with Fire. Otherwise, you can only use Psychokinesis.
To acquire this book, you must read all long books from Jinbocho. - Magatsu-Izanagi (Picaro)’s unique trait “Hollow Jester” can amplify damage by 40% per ailment even without hitting a technical hit. Note that ailments can stack, so if the enemies have two ailments, you can deal 196% damage!
- However, if your opponent is weak against the element you will use to deal Technical Hits, the hit won’t be technical, and thereby the “Universal Law” trait won’t be activated. You should use “Relentless” trait instead or change to another element.
- Raged enemies will always use normal attacks with doubled power but also receives doubled damage in all Persona series.
- In P5R, use Fire (Inferno or Blazing Hell) or Psychokinesis skills (Psycho Force/Blast) in order to land a Technical Hit on enraged enemies. The “Universal Law” Trait (Innate Trait from Kohryu) can further amplify Technical Hit damage.
Because P5S is not a turn-based game, all support skills are timed instead of turn-based. It is crucial to unlock “BOND” skills in order to make supports more extensive.
Building Personas
You will need to make the Protagonist’s Personas be extremely professional in one aspect, especially when you prepare for high-difficulty battles. In other words, “jack of all trades, but master of none” is in fact a terrible build (e.g.: a Persona that can attack in all elements) for Protagonist’s Personas. Each Persona has eight skill slots, so build your Personas wisely.
- DPS Persona: This kind of Persona will have only one or two most powerful attack skills. All other skills should be passive skills that amplify the damage.
- Use Elemental Boost and Amp to increase damage. In P3RE, the P5R DLC Personas have Elemental Driver passive, which can increase damage even further.
- Use Arm Master or Spell Master to reduce skill cost.
- For Physical Skills, Add “Apt Pupil” to increase critical rate.
- Make sure your DPS Persona can Nullify, Repel or Drain the element you use in case you don’t know if your target can repel or if you are using AoE skill.
- In P5R, the “Tyrant’s Mind” is a pretty good passive skill. It is not subject to 2.0x damage cap, but it’s limited to Satanael, unfortunately.
- In P5R, you must also properly utilize traits in order to further amplify damage output.
- “Pagan Allure” trait (default trait from Satanael) is subject to to 2.0x damage cap, so it has no effect if your Persona will use Magic Ability, Elemental Boost and Elemental Amp. You should instead consider other traits.
For example, you can use “Intense Focus” instead of “Pagan Allure” if you want your DPS deals powerful damage on single enemy.
“Pagan Allure” trait is only viable for Personas that covers all Magic elements. - “Undying Fury” trait (default trait from Zaou-Gongen) is the prime choice for Physical-Skill DPSes (e.g.: Yoshitsune). However, it’s not sure if this applies on Gun Skills.
- “Will of the Sword” trait (default trait from Futsunushi) raises the multiplier from 2.5x to 3.0x rather than 7.5x, so the actual multiplier is in fact 1.2x. However, this trait begins the battle with Concentrate effect, so it’s actually the prime choice for Startup Persona.
This is the ultimate reason that “Will of the Sword” is less ideal for Yoshitsune than “Undying Fury”. You can, instead, use this trait for Gun-Skill DPSes. - “Universal Law” trait (default trait from Kohryu) is the prime choice for Technical-Hit DPSes. Psychokinesis and Nuclear skills can cover all types of ailments, so make sure DPSes for these two elements use “Universal Law” trait.
This trait is not limited by 2.0x damage cap, so you can use Boost + Amp + Magic Ability + Spell Master + Universal Law to produce insane damage via Psycho Force skill.
- “Pagan Allure” trait (default trait from Satanael) is subject to to 2.0x damage cap, so it has no effect if your Persona will use Magic Ability, Elemental Boost and Elemental Amp. You should instead consider other traits.
- If you have free slots, use passive skills to cover all weaknesses.
- Raise your Persona stats (St for physical or Ma for magical) to maximum.
- “Izanagi-no-Okami (Picaro)” is the well-known game-breaker Persona in P5R. The signature trait “Country Maker” can amplify the damage to 200% without being limited by 2.0x damage cap. You must fulfill the entire Persona compendium in order to deal massive damage. As the Almighty DPS, you need the following passive:
- Almighty Boost: This skill can be learned by Izanagi-no-Okami (Picaro) as they are leveled up. You do not need to learn it via Network Fusion.
- Almighty Amp and Magic Ability: This skill can’t be learned by anyone and it can only be obtained via Network Fusion.
Because the skills you can obtain is random, you are strongly recommended to fully fill your Persona stock in order to have a large number of combinations so that these skills can appear with a higher chance. You should be able to obtain Magic Ability and Almighty Amp in 30 minutes. - You can inherit at most 5 skills for Izanagi-no-Okami (Picaro). You must inherit “Almighty Amp” and “Magic Ability” through these slots. You must choose “Country Maker” trait for Izanagi-no-Okami (Picaro).
“Spell Master” is only necessary if you want to save SP medicines on very extensive battles because the “Victory Cry” passive can fully recover HP/SP after battle. - “Tyrant’s Mind” is a great skill not subject to 2.0x damage cap. However, it’s Satanael’s signature skill, so unfortunately no other Personas can learn this skill.
- Startup Persona: This kind of Persona will use “Auto-” passives to increase the stats of the whole team. This will significantly save your SP and turns to support your team. You must equip your Startup Persona before every battle.
- A Startup Persona should have “Auto Mataru” to increase all allies’ attack, “Auto Maraku” to increase all allies’ defense, “Auto Masuku” to increase all allies’ agility, and “Auto Rebellion” (not available in P5R) to increase the protagonist’s critical rate.
- “Invigorate 3” and “Regenerate 3” are recommended because they can recover some HP and SP on your first turn, but it’s not necessary if you are rich in HP/SP medicines. In P5R, you can also use “Holy Whisper” (restore 15 HP and 15 SP per turn).
Note that these passives can stack. If you have all “Invigorate 1,2,3” skills, you can restore 3+5+7=15 SP per turn. - In P5R, “Will of the Sword” trait is the prime choice for Startup Personas since it will begin the battle with Concentrate for Joker. It’s especially useful when your enemy can use Dekaja (e.g.: Lavenza) from the beginning of the battle.
- Others are free choices. You may even add Apt Pupil to make your normal attacks more critical if you are rushing very weak enemies.
- Supporter Persona: This kind of Persona will deal buff on allies and debuff on enemies. You might need two Supporter Personas.
- Cover all aspects of stats, including attack (Matarukaja/Matarunda/Charge/Concentrate), defense (Marakukaja/Marakunda), agility (Masukukaja/Masukunda), negation (Dekaja/Dekunda), ailment rate (Foul Breath/Stagnant Air) and critical rate (Rebellion/Revolution). Heat Riser and Debilitate, which increases or decrease all stats of one also recommended.
- Cover all aspects of resistances, including Elemental Break for affinities and Tetra/Makara Break for repelling walls.
- It is worth noting that “Neo Cadenza” in P5R is a very cheap skill that recovers 50% HP for all allies and that increases attack, defense and agility for all allies. This makes Orpheus F (Picaro) a prime choice of supporter Persona in P5R.
- “Wealth of Lotus” trait (default trait from Lakshimi) in P5R can extend buff (-kaja only) by two turns. This trait is the prime choice of buffer Persona in P5R.
- “Thermopylae” skill can cast “Heat Riser” effect on all allies but it is only usable when surrounded, but the trait “Vitality of the Tree” can allow any surrounded-only skills to be used in any circumstances. If, for some reason, you aren’t allowed to use DLC Personas like Orpheus F (Picaro), using Personas with both “Vitality of the Tree” and “Thermopylae” is the prime choice.
- “Ave Maria” trait (default trait from Maria) in P5R can reduce support skill costs into a quarter. This trait is the prime choice of other types of supporters.
- Use Spell Master to reduce skill cost.
- Use Passive skills to cover the weaknesses.
- Healer Persona: This kind of Persona will heal all of your teammates. Healer is especially helpful if you are using Physical-Skill DPSes.
- Cover all aspects, including HP (Mediarahan), ailments (Amrita Shower) and revival (Samarecarm).
- Only use the “Salvation” (HP+Ailments) skill when necessary because it costs a lot of SP.
- “Grace of Mother” trait (default trait from Ishtar) in P5R can reduce healing skill costs into a quarter. This trait is the prime choice of healers.
- Use Spell Master to reduce skill cost.
- Use Passive skills to cover the weaknesses.
- Ailment Persona: This kind of Persona will inflict ailments on your enemies. Other than dealing Technical Hits in P5, ailments can be exceedingly useful in order to avoid enemies from using certain skills. (e.g.: Mot as shadow in P5 can turn your teammate into a rat and there’s no cure to it; the best way to counter is to use ailments like Forget, Sleep etc. to prevent it from using skills)
- This Persona should at least be able to inflict Rage because it can significantly increase your damage.
- In P5R, Sleep and Dizzy are also recommended because any element of attacks can deal a technical hit on them. The “Phantom Snow” from Raoul is a prime choice to inflict Sleep ailments because its probability is very high and the skill itself is very cheap.
- For whatever types of ailment you use, make sure this Persona has passive skills that boosts probability. The “Ailment Boost” passive is a must-have passive.
- Ailment Skills are very cheap (10 SP at most), you probably don’t need Spell Master to reduce the cost.
- “Foul Stench” trait in P5R can raise ailment affliction rate. This trait is the prime choice of Ailment Persona.
“Gloomy Child” trait can activate weather-specific passive skills. “Ambient Aid” passive can greatly increase ailment success rate. - Use Passive skills to cover the weaknesses.
- Drainer Persona: This kind of Persona will drain SP from your enemies. It’s very useful to save your SP medicines. But it is optional. You do not need them if you have sufficient SP medicines.
- In order to safely drain as much SP as possible, you need to inflict ailments that can render all enemies inactive (e.g.: Sleep). In other words, drainer is not very viable in boss fights. You’d better use SP medicines before boss fights.
Note that Sleep is the prime choice of ailment since it can recover enemy’s HP/SP so that you can drain more SP. - In P5R, the Spirit Drain skill can only drain 10 SP. Therefore, the drainer Persona must have “Draining Mouth” trait to double the amount of drained SP.
- You can put Invigorate 3 passive on your drainer so that your SP recovers much quicker.
- You do not need to drain HP because you can “convert SP into HP” by using healing skills. Also, you will earn lots of “Life Stones” that recovers 30% of HP once you enters the NG+.
- Your enemies will not be able to use skills if you drained all SP from them.
- In order to safely drain as much SP as possible, you need to inflict ailments that can render all enemies inactive (e.g.: Sleep). In other words, drainer is not very viable in boss fights. You’d better use SP medicines before boss fights.
- “Growth 3”: The “Growth 3” is a very useful passive skill to level up Personas. It is recommended to bring low-level Personas with this passive skill in your inventory and farm experience from high-difficulty battles like Reapers. Once their level is sufficient, use a skill card to replace it.
Note that Growth passives do not stack. So just put Growth 3.
You will primarily utilize the “Recipe Generator” tool in order to build your ideal Personas. Skill cards can work, but it’s typically supposed to be replacing “Growth 3” unless you are rich in skill cards.
P5T
In P5T, every character from the Phantom Thieves can use sub-Personas. The sub-Personas only have two skill slots. One is innate and the other is inherited from fusion. Equipping sub-Personas will increase HP and SP and have two more skills for the Phantom Thieves. DLC Personas, due to their high stats, will make your team drastically tanky and staminal.
There are no skill cards in P5T, so you must build your Personas by proper fusion in Velvet Room.
Classic Persona Builds
Here lists some good practice of Persona Builds. You are recommended to copy these builds in NG+ with lots of cash. Due to randomness, this blog cannot offer exact formulae for best practices.
P5R
In P5R, “Magic Ability” is the most important passive skill to amplify magic damages. However, the source is random and can only be done through Network Fusion. The fastest way to obtain this skill is to fill the Persona inventory. In addition, you should also obtain “Almighty Boost” and “Almighty Amp” so that you can build a powerful Almighty Persona like Izanagi-no-Okami (Picaro).
Yoshitsune: Physical Skill DPS
Yoshitsune is the prime choice of Physical Skill DPS in P5R.
- “Undying Fury” is the prime choice of trait for Yoshitsune. This is the default trait for Zaou-Gongen. So, make sure your Zaou-Gongen has this trait.
- “Hassou Tobi” is the exclusive skill from Yoshitsune and it is uniquely strong.
- “Sword Dance” can deal critical hits. It can be particularly useful when you fight Lavenza.
- “Apt Pupil” can double the critical rate.
- “Arms Master” can reduce skill cost by half.
Satanael: Gun DPS
Satanael is probably the only choice to build a Gun Skill DPS in P5R if you aim for high power.
- “Will of the Sword” is the only trait that can boost up the power of Gun Skills usable by Satanael.
- “Tyrant’s Mind” is Satanael’s unique skill that powers up any attacks.
- “Gun Boost” and “Gun Amp” can amplify Gun Skill damage.
- “One-Shot Kill” and “Riot Gun” are the best high-power Gun Skills.
- “Apt Pupil” can double the critical rate, since Gun Skills can hit critically.
- “Arms Master” to reduce skill cost.
- “Victory’s Cry” if you want to abuse Satanael on small mobs.
Satanael: Hybrid Magic DPS
Satanael’s default trait “Pagan Allure” can boost any magic skill damage by 50%, but, unlike “Universal Law”, it can’t exceed the 2.0x cap.
- “Pagan Allure” trait is used as we are going to make a Hybrid Magic DPS.
- “Magic Ability” passive can boost any magic skill damage by 25%.
- “Tyrant’s Mind” is Satanael’s unique skill that powers up any attacks.
- “Spell Master” to reduce skill cost.
- “Victory’s Cry” if you want to abuse Satanael on small mobs.
- Add any Severe-tier magic skills you like.
Mada: Fire DPS
Mada is the prime choice of Fire DPS in P5R with cheap SP cost.
- “Drunken Passion” is the default trait of Mada. It can reduce Fire skill cost to a quarter.
- “Inferno” and “Blazing Hell” are the severe-tier Fire skills. Mada can learn them by default.
- “Fire Boost”, “Fire Amp” and “Magic Ability” can amplify damage by 100%. Note that Mada can learn “Fire Amp” by default.
- “Spell Master” can further reduce the cost. Mada can learn it by default.
- “Burn Boost” can further assist the chance to inflict burn on enemies.
- “Null/Repel/Drain Ice” should be added since Mada is weak to Ice.
Asterius (Picaro): Fire DPS from DLC
Asterius (Picaro) is the prime choice of Fire DPS in P5R with very unique specialties and can deal more powerful damage than Mada.
- “Frenzied Bull” trait – default trait from Asterius (Picaro) – can amplify damage when Joker’s HP is lower than 50%. If Joker has only 1HP left, “Frenzied Bull” can amplify damage by 50%.
- “Mighty Gaze” trait can amplify damage by 20%. Therefore, if you can maintain Joker’s HP below 30% safely, “Frenzied Bull” is the prime choice.
- “Titanomachia” skill is the most powerful Fire skill with a very high chance to inflict Fear on enemies. The cost is also cheap.
- You can discard “Maragidyne” from Asterius (Picaro).
- Since Asterius (Picaro) can only resist Fire damage and “Titanomachia” is an AoE skill, “Null/Repel/Drain Fire” is required in case enemies can repel Fire skills.
- “Null/Repel/Drain Ice” is required since Asterius (Picaro) is weak to Ice.
- “Fire Boost”, “Fire Amp” and “Magic Ability” can amplify damage by 100%.
- “Fear Boost” is recommended in order to increase the chance of Fear.
Satan: Ice DPS
Satan is the prime choice of Ice DPS in P5R with cheap SP cost.
- “Cocytus” is the default trait of Satan. It can reduce Ice skill cost to a quarter.
- “Diamond Dust” and “Ice Age” are the severe-tier Ice skills. Satan can learn them by default.
- “Ice Boost”, “Ice Amp” and “Magic Ability” can amplify damage by 100%. Satan learns none of them by default so these skills must be obtained from somewhere else.
- “Spell Master” can further reduce the cost.
- “Freeze Boost” can further assist the chance to inflict freeze on enemies.
- Satan has a free choice. It can be “Ailment Boost” to further increase chance to freeze enemies.
Odin: Electricity DPS
Odin is the prime choice of Electricity DPS in P5R with cheap SP cost.
- “Bargain Bolts” is the default trait of Odin. It can reduce Electricity skill cost to a quarter.
- “Thunder Reign” and “Wild Thunder” are the severe-tier Electricity skills. Odin can learn them by default.
- “Elec Boost”, “Elec Amp” and “Magic Ability” can amplify damage by 100%. Note that Odin can learn “Elec Amp” by default.
- “Spell Master” can further reduce the cost.
- “Shock Boost” can further assist the chance to inflict shock on enemies.
- Odin has a free choice. It can be “Ailment Boost” to further increase chance to shock enemies.
Baal: Wind DPS
Baal is the prime choice of Wind DPS in P5R.
- “Vahana’s Wings” is the default trait of Vishnu. However, Vishnu cannot nullify Wind attacks. It is dangerous when using AoE Wind skills. We choose Baal instead of Vishnu.
- “Panta Rhei” and “Vacuum Wave” are the severe-tier Wind skills. Baal can learn them by default.
- “Wind Boost”, “Wind Amp” and “Magic Ability” can amplify damage by 100%. Baal learns none of them by default so these skills must be obtained from somewhere else.
- “Spell Master” can further reduce the cost.
- Baal has two free choices.
Chi You: Psychokinesis DPS
Chi You is the prime choice of Psychokinesis DPS in P5R with cheap SP cost.
- “Chi You’s Blessing” is the default trait of Chi You. It can reduce Psychokinesis skill cost to a quarter.
- “Psycho Force” and “Psycho Blast” are the severe-tier Psychokinesis skills. Chi You can learn them by default.
- “Psy Boost”, “Psy Amp” and “Magic Ability” can amplify damage by 100%. Chi You learns none of them by default so these skills must be obtained from somewhere else.
- “Spell Master” can further reduce the cost.
- “Null/Repel/Drain Nuke” should be added since Chi You is weak to Nuclear.
- Chi You has one free choice.
Kohryu: Technical DPS for Mind Ailments
Kohryu is the prime choice of Technical DPS for Mind Ailments (Rage, Fear, Brainwash, Forget, Confuse and Despair). You are strongly recommended to build Chi You before building Kohryu.
- “Universal Law” is the default trait of Kohryu. It can amplify Technical damage by 50%.
Please note that if your enemy is weak to an element you are using to make a Technical Hit, this hit is not considered technical and “Universal Law” trait thereby won’t activate. - “Psycho Force” and “Psycho Blast” are the severe-tier Psychokinesis skills. Kohryu can learn Psycho Force by default and you can obtain “Psycho Blast” from Chi You.
- “Psy Boost”, “Psy Amp” and “Magic Ability” can amplify damage by 100%. Kohryu can learn “Psy Amp” by default, so you can obtain “Psy Boost” and “Magic Ability” from Chi You. Please note it is assumed that you have built Chi You properly.
- “Spell Master” can further reduce the cost. Kohryu can learn it by default.
- Kohryu is weak to Nuclear. You might want to use this weakness to bait Lavenza so that she won’t use “Tetrakarn”. In this case, you need to learn “Evade Nuke” and “Ali Dance” rather than “Null/Repel/Drain Nuke”. If you have Queen or Noir on your team, you don’t need to let Kohryu bait Lavenza.
Asura: Nuclear DPS
Asura is the prime choice of Nuclear DPS in P5R with cheap SP cost.
- “Atomic Hellscape” is the default trait of Asura. It can reduce Nuclear skill cost to a quarter.
- “Atomic Flare” and “Cosmic Flare” are the severe-tier Nuclear skills. Asura can learn “Atomic Flare” but can’t learn “Cosmic Flare”. You need to acquire “Cosmic Flare” elsewhere.
- “Nuke Boost”, “Nuke Amp” and “Magic Ability” can amplify damage by 100%. Asura learns none of them by default so these skills must be obtained from somewhere else.
- “Spell Master” can further reduce the cost.
- Asura has two free choices.
Nuclear can deal Technical Hits on Body Ailments (Burn, Freeze and Shock). There is no specific prime choice of DPS. You can build such a Persona in the same way as Kohryu.
Kaguya (Picaro): Bless DPS from DLC
Kaguya (Picaro) is the prime choice of Bless DPS in P5R.
- “Mighty Gaze” trait is the prime choice since it can amplify multi-target damage by 20% due to the special skill “Shining Arrows”.
- “Shining Arrows” can deal 4 to 8 light Bless damages. Even if there were only 4 hits landed, it’s still more powerful than “Makougaon”.
- “Makougaon” can deal 1 heavy Bless damage. This is meaningful when enemies are very low HP and you need to deal a high damage number. Note that multi-hit skills stop counting hits when enemies are dying.
- “Bless Boost”, “Bless Amp” and “Magic Ability” can amplify damage by 100%. Kaguya (Picaro) learns none of them by default so these skills must be obtained from somewhere else.
- “Spell Master” can reduce the cost.
- “Null/Repel/Drain Fire” should be added since Kaguya (Picaro) is weak to Fire.
- Kaguya is better than Kaguya Picaro due to the additional resistance to Wind.
- Kaguya (Picaro) has two free choices.
Daisoujou: Bless Insta-Kill DPS
Daisoujou is the prime choice of Bless DPS to deal Insta-Kill in P5R.
- “Just Die” trait is the prime choice since it can reduce insta-kill skill cost to 0.
- “Samsara”, unique skill from Daisoujou, can deal Bless Insta-Kill to all foes with a high probability.
- “Hama Boost” can further increase the chance of Bless Insta-Kill.
- “Null/Repel/Drain Curse” should be added since Daisoujou is weak to Curse.
- Daisoujou has five free choices.
Tsukiyomi (Picaro): Curse DPS from DLC
Tsukiyomi (Picaro) is the prime choice of Curse DPS in P5R.
- “Mighty Gaze” trait is the prime choice since it can amplify multi-target damage by 20% due to the special skill “Abyssal Wings”.
- “Abyssal Wings” is the only severe-tier Curse DPS skill. Unlike Kaguya (Picaro), Tsukiyomi (Picaro) does not have to learn “Maeigaon” because “Abyssal Wings” is already a one-hit skill.
- “Curse Boost”, “Curse Amp” and “Magic Ability” can amplify damage by 100%.
- “Spell Master” can reduce the cost. Tsukiyomi Picaro can learn it by default.
- “Null/Repel/Drain Nuke” should be added since Tsukiyomi (Picaro) is weak to Nuclear.
- Tsukiyomi (Picaro) has two free choices.
Alice: Curse Insta-Kill DPS
Alice is the prime choice of Curse DPS to deal Insta-Kill in P5R.
- “Just Die” trait is the prime choice since it can reduce insta-kill skill cost to 0.
- “Die For Me!”, unique skill from Alice, can deal Curse Insta-Kill to all foes with high probablity.
- “Mudo Boost” can further increase the chance of Curse Insta-Kill.
- “Null/Repel/Drain Bless” should be added since Alice is weak to Bless.
- Alice has five free choices.
Attis: Use All Surrounded-Only Skills
Attis’ default trait “Vitality of the Tree” can enable surrounded-only skills.
- “Thermopylae” skill can increase all stats for all teammates with a cheap cost. Attis learns this skill by default. This makes Attis a prime choice of supporter when you can’t use Orpheus F (Picaro).
- “Cornered Fang” skill can deal severe Physical damage with high chance of critical rate and with a cheap cost.
- “Adverse Resolve” skill can increase critical rate.
- “Last Stand” skill can significantly reduce enemy accuracy.
- “Null/Repel/Drain Curse” should be added since Attis is weak to Curse.
- Attis has three free choices.
Orpheus F (Picaro): Supporter from DLC
Orpheus F (Picaro) is the prime choice to add buff on all allies.
- “Neo Cadenza” skill can increase all stats for all teammates with a cheap cost. In addition, this skill can recover 50% HP for all allies.
- “Wealth of Lotus” trait can increase the duration of “Neo Cadenza” effect for two more turns. This is the default trait from Lakshimi, so make sure this Persona has this trait.
- “Null/Repel/Drain Elec & Curse” should be added since Orpheus F (Picaro) is weak to Electricity and Curse.
- “Divine Grace” passive can boost the recovery effect of “Neo Cadenza”, making this skill recover 75% HP for all allies.
- Orpheus F (Picaro) has four free choices.
P5T
In P5T, all Personas have only one open slot for extra skills. This guide lists some important Personas that you should build.
Tam Lin & Dionysus: Primary EXP Farmer
These two Personas can grant massive EXP to the player. Since levels won’t be carried over to NG+, you will need these two Personas in all playthroughs in order to reach level 99 and unlock all skills. Reaching level 99 is also required to unlock “Unparalleled Strength” trophy. All of them should obtain both of the following skills:
- Efficiency Aficionado: Boosts EXP gained after battle. Innate skill from Tam Lin.
- Knack for Conflict: Amplifies EXP gained after battle. Innate skill from Dionysus.
Ardha: Secondary EXP Farmer
This Persona has innate “Auto-Masuku” passive that grants extra movements to all allies. This may help you farm EXP with less turns.
- Auto-Masuku: Automatically boost movement range at the start of battle. Innate skill from Ardha.
- Knack for Conflict: Amplifies EXP gained after battle. Innate skill from Dionysus.
Sandman & Ganesha: Money Farmer
These two Personas can grant massive money to the player. These two Personas can also help you unlock “Metaverse Aristocrat” trophy faster. All of them should obtain both of the following skills:
- Treasure Hunter: Boosts Money gained after battle. Innate skill from Sandman.
- Easy Money: Amplifies Money gained after battle. Innate skill from Ganesha.
You can also build Ardha with “Easy Money” skill. However, money can be carried over to NG+, so you should rebuild Ardha with “Knack for Conflict” after you have accumulated sufficient money.
Yoshitsune & Vohu Manah: Agility Rusher
Agility is the most critical aspect of the game. They can create a huge area of Triangle Threat so that you may annihilate as many enemies as possible. These two Personas can grant the most permanent agility to the user. They are extremely useful in regular battles. They should have both of the following skills:
- God-Like Speed: Increase movement by 1 square. Innate skill from Yoshitsune.
- Eagle Eyes: Increases Ranged Attack by 2 squares. Innate skill from Vohu Manah.
Mona and Fox are ideal users of these two Personas since they are gifted with the most agility.
Vishnu: Agility Supporter
If the battle will take more than 3 turns, you may equip Vishnu Persona to boost agility.
- Auto-Masuku: Automatically cast Masukukaja at the beginning of the battle. Innate skill from Ardha.
- Masukukaja: Boost movement range for all allies for 3 turns. Innate skill from Vishnu.
Raphael & Kali: High-HP DPS
High-HP DPS can deal significant amount of damage to the enemy. They are the most versatile DPSes since keeping high HP is simple as long as the player covers them well throughout the battle. They should have both of the following skills:
- Rising Vigor: Amplifies damage when HP is above 80%. Innate skill from Raphael and Kali.
- Endless Fighting Spirit: Boosts damage when HP is above 50%. Innate skill from Archangel and Mithras.
Crow should play the role of DPS since his ultimate skill “World’s End” deals more damage than any others. He can also use “Heat Riser” skill which boosts his attack, defense and movement range when his attack cannot reach the target.
Social Link System
Maximizing all Social Links (Confidants in P5R) is the most crucial game experience in the Persona series. However, this is typically impossible on the first run because certain social links require a great level of social stats. You will aim to maximize social stats on the first playthrough of the game and then maximize all Social Links in the NG+ playthrough. Note that P4AU, P5S and P5T do not have this system.
To level up Social Links, you will have spend time with them. Different people have different schedules. Therefore, you must plan your schedule wisely. The process of leveling up Social Links is basically going through dialogues. Choosing correct replies in the dialogue options can accelerate leveling your Social Links. It is recommended that you use detailed online guides to find their schedules and best replies.
Certain female Social Links are viable to form a romantic relationships. You can have more than one girlfriends, but it’s not recommended. In Persona 3, you must trigger romance flags in order to have the option to choose whether you will be her boyfriend. You cannot dump your girlfriend, and the romance option will not come back again. Therefore, if you made a mistake on choosing the romance option, the only thing you can do to fix is to revert your save data. Forming a romantic relationship will give you chances to spend special time with them in certain events (e.g.: Christmas). Note that romance is viable on your first playthrough because it is absolutely possible to maximize a few Social Links in the first playthrough.
Each Social Link person will have a corresponding major arcana from the Tarot. If you have a Persona in your inventory (not the Persona Compendium) with the same arcana to that person, you can level up your Social Link much faster.
During class, the teacher may ask your classmates some questions. They would get panicked and ask for your help. Successfully answering the question will increase the Social Link point.
The Social Link mechanism also features a praying feature. You can pray in certain places in order to increase more points for any arbitrary Social Link.
The Social Link level can affect the result of Persona Fusion. If the Social Link level of the arcana is maximized, the target Persona will receive an immense amount of experience. Maximized Social Links can also unlock ultimate Personas and they are the keys to reach 100% Persona Compendium. If correctly built, they are extremely powerful.
In P4G and P5R, you may receive extra effects (e.g.: Your teammates may have new skills on their Personas) during the level up process. Maximizing Social Link with your teammates will evolve your teammate’s Persona.
Reaper Fight
Reaper is a powerful boss in Persona series since Persona 3. Among the Persona games I played, it appears in P3RE, P4G, P5R and P5S. It doesn’t appear in P5T. Defeating Reaper will drop immense amount of experience points and it can appear again so it’s a good source to farm EXP.
P5R Reaper
In P5R, Reaper can spawn in Mementos on any unsafe levels if you stayed on that level for a very long time. Morgana will inform you its presence and you will hear the sounds of rattling steel chains. It is recommended to challenge it from at least Level 60. It has two moves per turn. If Reaper ambushes you, however, it will only have one move per turn, making the fight much easier. Reaper can exploit your team’s weaknesses. However, if anyone has a magic wall (via Makarakarn), Reaper will be forced to use Concentrate + Megidolaon. So it is strongly recommended to make someone wear Ring of Gluttony so that Reaper will always use this fixed pattern, rendering Reaper unable to hit weaknesses. It doesn’t have weakness and doesn’t resist any elements. It’s immune to all ailments and can’t be insta-killed.
Due to the fixed pattern, my recommended course of action is to stack Heat Riser (ATK/DEF/AGI up) and Charge/Concentrate (next attack deals more than double damage) on your DPS, and to inflict Debilitate (ATK/DEF/AGI down) on Reaper. Orpheus F (Picaro) is strongly recommended because this Persona’s unique skill “Neo Cadenza” can recover 50% HP for all allies and inflict Heat Riser effects on all allies. The Ring of Pride (Hammered Will Seed from Shido’s Palace) and the Ring of Greed (Hammered Will Seed from Okumura’s Palace) are recommended because they can inflict Charge/Concentrate effect for any one of the allies with 15SP, same cost to the regular Charge/Concentrate skill. The Debilitate skill can be learned by your teammates by taking them to the Jazz Club on Dec.11th. Crow will learn Debilitate on Level 70. Queen will learn Checkmate on the evolution to Agnes. If you can consistently maintain this buff and debuff, you team will have a fairly good rate of evading Reaper’s attacks and will take significantly less damage from Reaper.
The “Beast Weaver” skill from Ariadne (Picaro) is strongly unrecommended because this skill will reduce all your future damage to 10% until the end of the battle, even though it has the strongest damage multiplier than any other skills. If you failed to kill Reaper with this skill, you have no choice but to rely on other DPSes on the team. This skill should only be used as last killer move and as a show-off of how much damage you can deal on the Reaper.
If you have properly built Izanagi-no-Okami (Picaro), you can cheat the Reaper fight by abusing “Myriad Truths” skill.
P5S Reaper
P5S Reaper is the final boss fight that will enable NG+. In other words, it won’t spawn during the story. This boss fight has two phases and the second phase will activate once you depleted Reaper to 50% HP. In the first phase, Reaper will cast any kinds of elemental “-dyne” spells. In the second phase, Reaper will cast Megidolaon and Riot Gun.
Wolf is strongly recommended due to his supportive skills and he has no weaknesses against any elements. It is recommended to fully charge Show Time skills for all allies before fight. When you use Show Time, make sure that you have ATK up (Wolf can cast Heat Riser or Tarukaja) effect and Reaper has DEF down (Wolf can cast Debilitate) effect.
Reaper only appear once per playthrough, so it’s not considered a good method to farm EXP.
P4G Reaper
P4G Reaper will appear in TV world by opening small treasure chests. If you continuously opened small treasure chests for 20 times, you will hear a rattling sound of steel chains and howls. You will also be prompted that the next chest you open has immense danger when you try to open it. Unlocking a golden chest or defeating a golden hand will reset this counter to a random number. This means you might face Reaper on your next small chest even if you haven’t opened any small chest at all.
The P4G Reaper will nullify any light and dark attacks and won’t resist any other elements. However, it will abuse Mahamaon and Mamudoon in later stage of fight, so you must either kill it quick or hoard a huge amount of Homunculus. Due to this nature, it is strongly recommended to reach Level 85 before fighting Reaper. Casting ATK buff for all allies and DEF debuff on Reaper is still the recommended course of action.
Teddie and Yosuke are not recommended because they cannot cast Power/Mind Charge which double the next attack. While Naoto can cast Mind Charge, she unfortunately doesn’t have Severe-tier attack skills. Her signature insta-kill skills are also useless against Reaper. The recommended team build is:
- Protagonist: Use supporter Persona which can cast Matarukaja on all allies and Debilitate on Reaper. Proper Startup Persona is strongly recommended to save turns. You must maintain the buff and debuff consistently. The protagonist does not have to be DPS. His primary role is to support all allies.
The prime choice for the Protagonist to be DPS is to build Yoshitsune Persona to maximum St power and use skill “Hassou Tobi”. - Chie Satonaka: She is the primary DPS. Abuse Power Charge and God’s Hand to deal colossal blows on Reaper.
- Kanji Tatsumi: He is the secondary DPS. Use Power Charge and Primal Force to deal severe blows on Reaper and cast Matarukaja on all allies if the ATK-up effect is nearly expire.
You must unlock the Emperor Social Link to Level 6 in order to unlock his Power Charge skill. - Yukiko Amagi: She is the secondary DPS. Use Mind Charge and Burning Petal to deal severe blows on Reaper and use Salvation or Mediarahan to heal Chie and Kanji, since physical skills cost lots of HP. You need “Fire Boost” and “Fire Amp” passive skills to make her damage even more severe.
You must unlock the High Priestess Social Link to Level 11 in order to unlock her Burning Petal skill. In other words, Yukiko must awaken her ultimate Persona Sumeo-Okami. You also need to bring her to hot spring for five times in order to unlock her Mind Charge skill.
P3RE Reaper
Reaper in P3RE will appear in Tartarus if you stay on a floor for too long. Reaper will appear much quicker if the floor is dark. Fuuka Yamagishi will inform you its presence. It is recommended to challenge it from at least Level 85 for all allies and after Fuuka has awakened her ultimate Persona Juno so that her Theurgy can cast Charge and Concentrate on all allies. It has two moves per turn and it can use elemental skills to target your team weaknesses, use ailments to disrupt your turns and use supportive skills. On the first turn, Reaper can use four moves. It doesn’t have weakness and doesn’t resist any elements. It’s not immune to ailments but can’t be insta-killed. Similar to P4G Reaper, it will abuse Mahamaon and Mamudoon in late stage of fight.
Before fight, make sure all allies – including navigator Fuuka – have fully charged their Theurgies. You also need to load your Startup Persona to boost ATK/DEF/AGI/Crit stats. You also need to learn Ambush from computer program so that you can always trigger chance encounter before fight – in other words, S.E.E.S. advantage. As you enter the fight, use Fuuka’s Theurgy to cast Charge and Concentrate. Then cast Debilitate on Reaper. The rest of the party will abuse their Theurgies in their turns. If you are on Normal or even lower difficulty, this strategy should end the Reaper fight in one or two turns.
Note that the Tier-Q of Cups Tarot card can sometimes cast Auto Charge/Concentrate for all allies on next fight. This is a substitute option if Fuuka didn’t fully charge her Theurgy and if you are lucky to pick this card.
If you escaped the battle (e.g.: using Trafuri) from Reaper, the Reaper will still chase you. On top of that, Reaper will chase you all the way down even through stairs, making the Tartarus exceedingly dangerous to explore. The reaper will cancel the pursuit if you reached border floor, or if you used teleporters to translocate, or if you asked Fuuka Yamagishi to help you escape to the first floor.
If the Reaper appeared on a floor with Monad Doors, entering and exiting the Monad Door will cause Reaper to disappear and prevent it from appear again on the current floor until you leave the current floor.
Protagonist can Abuse Armageddon
The “Armageddon” Theurgy has a fixed damage of 9999 regardless of any situations that may affect actual damage. Since Reaper has a fixed HP at 8000, you can instead simply abuse this Theurgy to kill Reaper in only one shot. However, should you wish to do so, it is strongly recommended to load a Persona with “Victory Cry” (e.g.: Orpheus Telos) before using Armageddon in order to recover your HP and SP after Reaper is killed, or otherwise you will have to use lots of SP medicines to recover and prepare for your next fight.
With this strategy, there is no recommended level for your allies. Just make sure you can trigger S.E.E.S advantage. You can farm Reaper anytime once you have a Persona with “Victory Cry” passive and fully charged your Theurgy. In other words, this is the perfect strategy to boost all of your allies to Level 99 quickly in NG+, because it is virtually impossible to fuse the Orpheus Telos (requires maximizing all Social Links) Persona in the first playthrough.
After any battle, if you are given an option to pull a Cups Tarot card that fully charges Theurgy gauge, make sure to pull that card in order to be ready to farm Reaper immediately.
You are strongly recommended to visit the fortune teller in Escapades and ask for “Soul Fortune” so that you can quickly recharge your Theurgy.
P3P Reaper
Reaper in P3P will appear in Tartarus if you stay on a floor for too long. Unlike P3RE, a dark floor won’t accelerate Reaper to spawn. The most significant factor of Reaper spawning time is the size of the floor. You may have to wait at most 12 minutes for Reaper to spawn. Also, Reaper can appear in any date, so Mitsuru Kirijo will inform you its presence, even before Fuuka Yamagishi joined S.E.E.S.. It has two moves per turn and it can use elemental skills to target your team weaknesses. It is strong against all elements except Almighty. Therefore, you will need to use Elemental Break skill in order to maximize your damage for your teammates. Junpei Iori, Aigis and Shinjiro Aragaki are unrecommended because they are Physical Skill DPSes. There is no skill that can remove physical resistances. Ken Amada is unrecommended because he does not have Elec Amp skill to amplify Electricity damage. Akihiko Sanada has Elec Amp but no Elec Break, so you need a Persona with Elec Break.
Similar to P5R Reaper, you can force P3P Reaper to use Concentrate + Megidolaon on every turn if you have casted Tetrakarn or Makarakarn. However, unlike P5R, it is hard to maintain Heat Riser buff on all teammates and Debilitate debuff on Reaper, so this strategy is virtually unviable on higher difficulties, since Concentrate + Megidolaon may immediately annihilate your team.
Similar to P3RE, the protagonist can abuse Armageddon to defeat Reaper. However, P3P Reaper does not produce significant amount of experience, so it’s not a reliable way to farm EXP. If you’re playing in NG+, use Monad to farm EXP instead.
Ultimate Boss Fight
In Persona series, the ultimate boss is the attendant of the Velvet Room. They are significantly stronger than the Reaper. Generally speaking, you are must evolve your teammates’ Personas so that they can evade magic attacks that address their weaknesses.
You can only win them once per playthrough. Make sure to save to a different slot before the fight so that you can try various strategies. Even if you fail, return to the save can recover the items you’ve used during battle.
P5R: Caroline and Justine
The deadline of this fight is Dec.22th, and they only appear in NG+ Mementos.
This fight consists of six phases. Each phase consists of six turns. If you failed to deal 2000 damage toward them in each phase, they will immediately knock down your whole team and deal a deadly all-out attack to end the fight.
For the sake of dealing enough damage, you are strongly recommended to bring your teammates to the Jazz club to increase their stats. You can also visit the church if you have chosen to forget amplifier passive skills before.
It’s strongly recommended to bring Futaba Sakura to the jazz club on Sunday in order to learn “Support Plus 1, 2, 3” (Allow her to cast random debuff on enemies during “Moral Support” skill) and “Support Rate Up” (Increase the probability for her to activate “Moral Support” skill). You need to bring her to jazz club for four times.
On Aug.14th and Nov.13th, bringing a teammate to Jazz Club can make them learn “Marakunda” so that they can temporarily reduce the defense of the twins. On Dec.11th, bringing a teammate to Jazz Club can make them learn “Debilitate” so that they can temporarily reduce all stats of someone.
It’s strongly recommended to maximize the Star confidant in order to swap any teammates in any turns so that you will gain more flexibilities in the fight.
The turn order of this fight is based on story order instead of Persona agility. Therefore, Joker always goes first and Crow always goes last.
- Phase I: The twins will use heavy physical and gun skills.
- Phase II: The twins will use heavy fire, ice, electricity and wind skills. They are clever enough to exploit the weaknesses. At the end of this phase, the twins will use Diarahan to recover each other to 100% HP.
- Phase III: The twins will use heavy psychokinesis, nuclear, bless and curse skills. They are clever enough to exploit the weaknesses.
- Phase IV: The twins will use heavy attacks of any sorts, not limited to magic, but their attacks are ordered. You can predict their attacks and use repeller Persona to deal damage right back at the twins.
- Phase V: The twins will use severe attacks of any sorts, not limited to magic, but their attacks are ordered. You can predict their attacks and use repeller Persona to deal damage right back at the twins.
- Phase VI: The twins will use severe attacks of any sorts, not limited to magic, and their attacks are random. This phase has no limit of turns but the entire fight has a limit. If you only managed to kill one of the twins before their turn, they will revive each other to 50% HP. This will make the fight even more extensive.
- The twins can deal Technical Hits on your team. Be careful about the ailments on your team. Noir is a good choice to reduce chance of ailments being inflicted on your team due to her Persona’s trait.
- If the twins managed to gain a one-more, they can use Dekaja and Dekunda to remove status changes.
- You have exactly six turns per phase and remaining turns are not carried over to the next phase. You have exactly fifty turns for the entire fight. They will knock down your entire team and use all-out attack to end the fight once all turns are used up.
- You can cheat the fight with Izanagi-no-Okami (Picaro) if you have properly built it. Unlike Lavenza, the twins don’t seem to have hidden Almighty resistance.
P5R: Lavenza
The deadline of this fight is Feb.1st, and she only appear in NG+ Mementos in the third semester.
This fight consists of four phases. Each phase consists of eight turns. You must deal 5000 damage to her within each phase, or otherwise she will knock down your whole team and end the fight.
Lavenza will not skip phase, but does not work like the twins did. If you managed to deal significantly sufficient damage in one turn so that you are already one phase ahead, she will still use one turn in this new phase then go to the next one. Due to this nature, you are strongly encouraged to bring a calculator to count the damage you have dealt to Lavenza.
Note that she will have two moves per turn on Phase I, II and III, and three moves per turn on Phase IV.
You can follow the same methods as the Twins’ fight to build your teammates (especially including your navigator, Oracle; she plays a great role in randomness in this fight so build her well).
On Jan.15th, bringing a teammate to Jazz Club can make them learn “Ali Dance” so that they will have a very good chance of evading attacks.
The turn order of this fight is based on the Personas’ agilities of your teammates, but Joker always goes first regardless of his agility.
Each phase has roughly 35% HP Damage Cap, meaning that you cannot deal more than 7000 HP damage to her in one phase and skip phases. However, multi-hit skills (e.g.: Yoshitsune’s “Hassou Tobi”, Izanagi-no-Okami (Picaro)’s “Myriad of Truths”) can ignore this limit.
If you managed to deal sufficient damage to skip phase, Lavenza will have one actions for each phase on her turn. For example, if you managed to deal more than 10K HP from Phase II, Lavenza will have one action in Phase III and have one action in Phase IV. And then it’s your turn.
- Phase I: She will start the fight by using Dekaja to remove all your auto-buff, and use Heat Riser on herself to raise attack, defense and agility.
In each turn, she will try to inflict ailments and use Fire, Ice, Electricity and Wind. She will take more damage if a correct element is used against her. You must remember the skill she used.
You don’t have to hit Lavenza with correct element in every turn. Therefore, if your off-element DPS is really too strong (e.g.: Izanagi-no-Okami (Picaro)’s Myriad of Truths), you can bruteforce in order to end the phase.- If she used Fire, then you should use Ice.
- If she used Ice, then you should use Fire.
- If she used Electricity, then you should use Wind.
- If she used Wind, then you should use Electricity.
- She will try to inflict Dizzy (Nocturnal Flash) on everyone. If anyone is inflicted with Dizzy, or if someone is weak against that element, she will use severe-tier skill to exploit Technical hit. Otherwise, she will use heavy-tier skill to attack everyone.
- Her turn is fixed, you can follow this schedule:
- Turn 0: Dekaja to clear all auto-buff of your team. Heat Riser to raise all her stats.
- Turn 1 and 5: If she has debuff, she will use Dekunda to clear it. Otherwise, Nocturnal Flash to inflict Dizzy on everyone. Then use Fire (Inferno or Maragidyne).
- Turn 2 and 6: Nocturnal Flash to inflict Dizzy on everyone. Then use Electric (Thunder Reign or Maziodyne).
- Turn 3 and 7: If your team has buff, she will use Dekaja to clear it. Otherwise, Nocturnal Flash to inflict Dizzy on everyone. Then use Ice (Diamond Dust or Mabufudyne).
- Turn 4 and 8: Nocturnal Flash to inflict Dizzy on everyone. Then use Wind (Panta Rhei or Magarudyne).
- Turn 9: If you didn’t manage to deal a sum of 5000 damage to her, you failed this phase and she will knock down your party and end the fight.
- She is resistant to all other elements in this turn. Bless and Curse attacks are nullified. So you must use correct elements against Lavenza in order to deal sufficient damage.
- You are recommended to build four DPS Personas for this phase.
- In the first turn, because she never attacked, use Dekaja and Debilitate to reduce her buff and also buff your team up.
- You can buy “Ultimate Spray” item from Kichijoji second-hand clothes shop so that everyone can cast Debilitate on Lavenza.
- You can buy “Kajaclear-R” item from Takemi clinic so that everyone can cast Dekaja on Lavenza.
- She is immune to ailments so you cannot deal Technical Hits.
- Make sure someone has “President’s Insight” in order to buff Joker with Concentrate, or use Panther’s “High Energy” skill to buff everyone with Concentrate, or let Haru grow enough Star Onions.
- Phase II: She is susceptible to ailments in this phase. You must deal Technical Hit at least once in every round of turns, or she will end the fight. She will recover from any ailments in her turn anyway, so your ailments won’t hinder her actions.
- Sleep and Dizzy allows every any attacks to be Technical Hits. However, these ailments will wear off after being hit. Joker won’t be able to use “Universal Law” trait to amplify the damage.
- Rage can double the damage and won’t wear off after landing a Technical Hit, albeit only Fire and Psychokinesis can be Technical. Due to the nature of damage multiplier from Rage, this is the strongly recommended option.
The easiest build for Ailment inflictor Persona is Koppa Tengu with “Gloomy Child” trait, “Ambient Aid”, “Ailment Boost”, “Rage Boost” passive and “Wage War”, “Taunt” skills. - Make sure you have a Technical Hitter Persona. It’s recommended to build Kohryu with “Universal Law” trait, “Psy Boost”, “Psy Amp”, “Magic Ability” passive and “Psycho Force” skills.
A proper build of Technical Hitter for Rage should end this phase very quickly. - It’s recommended to knock Lavenza down by your teammates (For Rage ailments, Panther or Noir), then Baton-Pass to Joker to deal Technical Damage with Kohryu again, if you are enraging Lavenza. Note that Baton-Pass can amplify damage.
- Technical Damage has a counterintuitive feature: the damage increases as the game difficulty increases. Therefore, you can deal more Technical damage in Merciless mode than in Easy mode.
- Lavenza can use Bless and Curse attacks in this phase. If your Persona is weak against them, or you put Crow and/or Violet, you should watch out for these attacks.
- Lavenza is resistant to all kinds of elements in this turn. Bless and Curse attacks are nullified. So you must use use Technical Hits against Lavenza in order to deal sufficient damage.
- Make sure someone has “President’s Insight” in order to buff Joker with Concentrate, or use Panther’s “High Energy” to buff everyone with Concentrate, or let Haru grow enough Star Onions.
- If you wish to solo Lavenza, you need the following:
- Guns with ailments camouflage: Guns can deal multiple damages per turn. Joker’s gun can deal physical ailments: Shock, Burn and Freeze. Enemies under Shock and Freeze can be dealt with Technical Hit by guns. Shock ailment can persist after being hit, so Shock is preferred to Freeze.
You are strongly recommended to need to equip a Persona that boosts ailment rate. - “Dream Needle” Persona: Such Persona is intended to deal both a Critical Hit and Sleep ailment in original turn to earn a 1-more, then deal the Technical Hit in the 1-more turn.
- Guns with ailments camouflage: Guns can deal multiple damages per turn. Joker’s gun can deal physical ailments: Shock, Burn and Freeze. Enemies under Shock and Freeze can be dealt with Technical Hit by guns. Shock ailment can persist after being hit, so Shock is preferred to Freeze.
- If you have properly stacked buff and debuff, and have built your Technical Hitter Persona properly, this phase can be done in only one turn.
- Due to damage cap, you cannot deal more than 7000 HP damage in this phase. If Noir managed to deal 5000 HP damage, you can only deal 2000 HP damage at most, regardless of your Kohryu’s build. On the other hand, if you simply used an item to knock Lavenza down, you may deal roughly 7000 HP by Kohryu at most.
You can use Izanagi-no-Okami (Picaro)’s “Myriad of Truths” skill to bypass the damage cap. If your Izanagi-no-Okami (Picaro) is properly built, you can skip Phase III to eliminate uncertainties.
- Phase III: She will not resist physical attacks and gun attacks. You must deal Critical Hit at least once in every round of turns, or she will end the fight. This phase may get tricky so try to end this phase as soon as possible, or try to skip this phase from Phase II.
- Mona, Noir and Violet have special skills to deal Critical Hits with high probability.
Violet is strongly recommended because she has innate “Apt Pupil” skill to double the critical rate, and her “Brave Step” skill can raise critical rate for all allies. Maintaining the critical-rate buff is very important in this phase.
“Revolution” casts a different Critical-Rate-UP buff than “Brave Step” and “Rebellion” universally (including Lavenza). These two buffs can stack so you might be able to reach 100% critical rate using “Sword Dance” with “Apt Pupil”. - It’s recommended to bring Violet to Jazz Club on Jan.22nd in order to learn “Arms Master” so that her “Sword Dance” skill can be used with halved HP cost.
- It’s a viable strategy to have Violet to spam “Brave Step” on all allies in previous phases so that everyone has a chance to deal critical damage in Phase III without maintaining buff in this phase.
- Make sure someone has “Tyrant’s Will” in order to buff Joker with Charge, or use Skull’s “Fighting Spirit” to buff everyone with Charge, or let Haru grow enough Earth Beans.
- It’s recommended for Joker to equip Yoshitsune after a Baton-Pass and use “Hassou Tobi” to deal high damage toward Lavenza. If buff and debuff are stacked properly, this phase should end right after “Hassou Tobi”.
- To build a Critical-Hit Persona for Joker, the “Sword Dance” skill with “Apt Pupil” passive should be enough. Yoshitsune can do this job.
- Lavenza is resistant to all other elements in this turn. Bless and Curse attacks are nullified. So you must use Physical skills to deal sufficient damage.
- Lavenza can use Tetrakarn to repel physical attacks if she can’t exploit weakness with Nuclear or Psychokinesis skills. Note that you can’t guarantee she won’t use Tetrakarn if only one of either Nuclear or Psychokinesis weakness can be exploited. You’d better have two of them simultaneously. The easiest way to do so is to put both Queen and Noir on the line.
If she used Tetrakarn, you can use Tetra Break skill to remove her repellent wall.
To prevent Lavenza from using Tetrakarn, put Queen and Noir in this phase, or use a Persona weak to Nuclear/Psychokinesis. They should reach Confidant Rank 10 and learnt Evasion skill so that they might not get hurt too much.
If you must use other skills instead of Tetra Break on Joker’s turn, let others use gun shot to spam her Tetrakarn. In this regard, you are strongly encouraged to customize your teammates’ guns with high-precision, low-damage, no-ailment accessories so that your teammates won’t lose too many health, waste ammo, and be inflicted with ailments.
Due to this feature, if you wish to solo Lavenza, you must equip a Persona weak to Nuclear and Psychokinesis. Add “Ali Dance”, “Angelic Grace”, “Climate Decorum” and “Evade Nuke/Psy” passives to increase the evasion rate. - Due to damage cap, you cannot deal more than 7000 HP damage in this phase. Yoshitsune’s “Hassou Tobi” has eight hits, so it’s not subject to this cap.
- Mona, Noir and Violet have special skills to deal Critical Hits with high probability.
- Phase IV: The only requirement in this phase is to finish her off as soon as possible. From this phase and forward, she can have three moves on her turn. There isn’t a limit of the number of turns where she will knock down your whole team and end the fight. However, after every 5 turns, she will use Concentrate+Megidolaon. It can kill everyone no matter what.
- Joker can equip a Persona with Enduring Soul which can survive a fatal attack and restore to full HP. Oracle’s “Final Guard” passive can also help survive this fatal blow. If she activated Final Guard, no one will take damage.
- Your teammates can learn “Endure” passive skill once their confidant rank is 8 or more. This can help surviving the Megidolaon if they haven’t used Endure yet.
- You can use “Holy Benevolence” skill (exclusive skill from Maria) to revive all party members.
- The exclusive trait “Circle of Sadness” from Orpheus (F) (Picaro) allows you to activate “Endure” (survive with 1HP) for four times. This trait allows you to survive even further if you really need an extensive fight. However, I’m not sure if this trait can activate “Enduring Soul” (survive with 100% HP) for four times.
- “Endure” and “Enduring Soul” can activate multiple times even without “Circle of Sadness” trait if you have multiple Personas with such skills. This implies you must remember which Personas have endured Lavenza’s Megidolaon.
- Repellent Persona can be very useful in this phase if you wish to solo Lavenza. To build a Repellent Persona, you need “Retaliating Body” trait to double the repelled damage and use passive skills to repel all attacks.
Kaguya (Picaro)’s unique trait “Inviolable Beauty” can triple the repelled damage. However, this Persona unfortunately does not have any innate repelling affinity, so expect certain elements can’t be repelled (e.g.: There is no “Repel Gun” skill in P5R. You can only use “High Counter” to repel gun skills like “Riot Gun” and be lucky). - She is very aggressive on deactivating buffs and debuffs in this Phase. But you can exploit this feature to limit her possible moves.
- She will use chainsaw (normal attack) to attack anyone who is not attacking right after their turns. Noir’s skill “Life Wall” is very useful against her chainsaw.
- She seems to lose her hidden resistance to Almighty attacks in this phase. You may be able to use Izanagi-no-Okami (Picaro) to quickly end this phase.
- She will use three Personas in this Phase. Each has the following affinities:
- Atavaka (Greenish Persona with four pairs of hands) is not resistant against Electricity, Wind and Psychokinesis.
- Thor (Yellowish Persona with a hammer) is not resistant against Ice, Wind and Nuclear.
- Lucifer (Dark Persona with three pairs of wings) is resistant against all elements. She only uses this Persona to cast Megidolaon on your team. After her turn using Lucifer, you should revive your teammates and try to cast buff.
This is the only turn she will have two fixed moves per turn in Phase IV.
- Lavenza is implicitly resistant to Almighty attacks. In other words, she takes significantly less damage from Almighty attacks. Therefore, it’s not very viable to use Izanagi-no-Okami (Picaro) to cheat the fight. Also, due to this nature, do not use All-Out Attacks and Show-Time Attacks. If you managed to knock down Lavenza, choose “Break Formation” then pass the baton to your strongest DPS or simply use the same move to attack again.
- To summarize, you are recommended to build the following Personas:
- For Phase I, have four elemental DPS Personas for Fire, Ice, Electricity and Wind in order to deal major damage.
- All four Personas should have “Magic Ability”, Elemental Boost, Elemental Amp and “Spell Master” passives.
- Their traits can be either reducing SP cost or “Will of the Sword”. It would be best if one of them has “Will of the Sword” trait because it can give Concentrate effect on Joker at the beginning of fight.
- Raise their Ma stats to 99 for most damage. Lu stats are trivial as you can’t inflict ailments on Lavenza in Phase I.
- If you want to save slots for Personas, you can instead build Satanael or Izanagi-no-Okami (Picaro) that covers these four elements. Both can only resist these four elements, so single-target skills are preferred in case they can be repelled. Plus, single-target severe-tier elemental skills has higher raw damage. In summary, put these skills on them:
- “Inferno”, “Diamond Dust”, “Thunder Reign” and “Panta Rhei” for single-target elemental attacks.
- “Magic Ability” to amplify damage for arbitrary magic skills by 25%.
- “Spell Master” to reduce SP cost.
- For Satanael: “Pagan Allure” trait to amplify any magic skills by 50%. “Tyrant’s Mind” skill to amplify any attacks by 25% and ignores damage cap.
- For Izanagi-no-Okami (Picaro): “Country Maker” trait to amplify any attacks by 100%. (Requires 100% Compendium)
- For Phase II, have one ailment Persona and one Technical Hitter Persona:
- Koppa Tengu: “Taunt”, “Wage War” skill, “Rage Boost”, “Ailment Boost”, “Ambient Aid” passives and “Gloomy Child” trait.
Raise Koppa Tengu’s Lu stats to 99 for highest successful rate.
If you saved enough “Rage Vial S/L” item (let’s say 12 in case of missed hits), you can go without bringing ailment Persona. Other ailment vials may work, but only Rage can amplify damage. - DPS Personas from Phase I may inflict ailments on Lavenza too. However, the chance is low. In addition, Psychokinesis can’t deal Technical Hits on Burn, Freeze and Shock. Use Nuclear instead.
But note that Asterius (Picaro)’s Titanomachia has a very good chance to inflict Fear. Use either Ice or Psychokinesis to deal Technical Hits for Fear ailment. - Kali: “Dream Needle” skill, “Sleep Boost”, “Ailment Boost”, “Ambient Aid”, “Apt Pupil”, “Trigger Happy”, “Adverse Resolve” passives and “Vitality of the Tree” trait. Use this Persona only for solo challenge.
Raise Kali’s Lu stats to 99 for best luck of dealing critical hit and inflicting Sleep. - Kohryu: “Psycho Force”, “Psycho Blast” skill, “Psy Boost”, “Psy Amp”, “Magic Ability”, “Spell Master” passives and “Universal Law” trait.
Raise Kohryu’s Ma stats to 99 for most damage.
- Koppa Tengu: “Taunt”, “Wage War” skill, “Rage Boost”, “Ailment Boost”, “Ambient Aid” passives and “Gloomy Child” trait.
- For Phase III, have one critical hit Persona:
- Yoshitsune: “Hassou Tobi”, “Sword Dance” skills, “Apt Pupil”, “Arms Master” passive and “Undying Fury” trait.
Raise Yoshitsune’s St and Lu stats to 99 for highest damage and critical rate.
Yoshitsune should use “Sword Dance” if no one have ever dealt a critical hit.
Yoshitsune should use “Hassou Tobi” if someone has already dealt a critical hit. - Vanadis (Violet’s Persona): “Brave Step”, “Sword Dance” skills, “Apt Pupil”, “Ali Dance”, “Evade Curse” passives.
Violet will help boost critical rates for all allies and deal critical hits on Lavenza. Once she dealt a critical hit, pass the baton to Joker and use “Hassou Tobi” to deal more damage.
If the critical-rate buff will expire in next turn, let Violet extend critical rate buff on one-more.
You are strongly recommended to bring Sumire Yoshizawa to Jazz Club on Jan.22nd night so that she can learn “Arms Master” passive to save HP.
Feel free to bring Sumire Yoshizawa to Jazz Club in order to increase her HP, St and Lu stats.
- Yoshitsune: “Hassou Tobi”, “Sword Dance” skills, “Apt Pupil”, “Arms Master” passive and “Undying Fury” trait.
- For Phase IV, have one or more survivor Personas and one revivor Persona:
- Orpheus (Picaro) is the prime choice due to the exclusive trait “Circle of Sadness” which can activate “Endure” for four times. “Endure” and “Enduring Soul” can stack.
You must count the number of turns and switch to survivor Persona on the correct turn. - Maria is the only choice due to her exclusive skill: “Holy Benevolence” to revive everyone to full HP. Note that, when you use this Persona, you might have only 1HP left.
You can also use “Holy Benevolence” by execute Maria on Electrical Chair during a fusion alarm. The accessory grants “Holy Benevolence” skill on wearer.
You can use “Renew-All” medicine from Takemi Clinic to revive everyone to full HP. One pill costs 250,000 yen.
Because reviving is not attacking, you should also add “Repel Phys” or “Drain Phys” passives to deal with her chainsaw.
Unique passives “Holy Whisper” and “Holy Embrace” can stack and are very useful to recover HP on your next turn. You can even stack “Regenerate 1,2,3” if you have more free slots.
- Orpheus (Picaro) is the prime choice due to the exclusive trait “Circle of Sadness” which can activate “Endure” for four times. “Endure” and “Enduring Soul” can stack.
- For Phase I, have four elemental DPS Personas for Fire, Ice, Electricity and Wind in order to deal major damage.
- Note that she will periodically use Dekaja and/or Dekunda every two turns in Phase I, II and III. This doesn’t mean your buff/debuff is meaningless. Instead, this behavior limits her possible moves so that she will attack you less.
Your Startup Persona must have “Will of the Sword” so that you still have Concentrate effect even after Lavenza’s initial Dekaja. Charge and Concentrate would probably be your most frequently used buff skill throughout the fight.
If you can’t maintain buff on your team and debuff on Lavenza, try to maintain no stats changes on both-sides. Stock enough “Kajaclear-R” items from Takemi’s clinic so that you can always clear buff on Lavenza. - I recommend the following team build:
- Noir: Her “Cool Customer” trait can significantly reduce the probability of being inflicted with ailments. Lavenza deals ailments a lot, so reducing ailments helps a lot.
She could also be a Technical Hitter (Psychokinesis can deal Technical Hits on all Mind ailments) in Phase II and Critical Hitter (One-Shot Kill has high critical rate) in Phase III. - Violet: Her “Veil of Midnight” trait can give you a chance that, when Lavenza strikes your weakness, you won’t be knocked down.
She is also the primary Critical Hitter and Critical-Rate supporter in Phase III. - Free Choice:
- Queen: Her “Checkmate” skill from third awakening can cast Debilitate effect on all foes. Due to the high SP cost of this skill, you are recommended to bring her to Jazz Club on Jan.29th to learn “Spell Master” passive.
She can also use “Mediarahan” skill to heal all allies. - Fox: His “Hyakka Ryouran” skill from third awakening can cast Heat Riser effect on all allies. Due to the high SP cost of this skill, you are recommended to bring him Jazz Club on Jan.29th to learn “Spell Master” passive.
He can also use “Brave Blade” to deal Critical Hits. - Mona: Its “Miracle Punch” or “Miracle Rush” skill can deal Critical Hit.
It can also use “Salvation” to heal all allies and cure all ailments. - Skull: His “Eccentric Temper” trait from third awakening can sometimes boost power of all allies’ physical attacks’ to 80%. This can make physical skills in Phase III extremely powerful so that it might end the fight right from Phase III.
- Panther: Her “Pinnacle of Magic” trait can sometimes reduce magic skill by half.
Her “Blazing Hell” skill is severe-tier and can deal Technical Damage on Rage. In other words, she can deal more Technical damage than Noir on Raged enemies.
- Queen: Her “Checkmate” skill from third awakening can cast Debilitate effect on all foes. Due to the high SP cost of this skill, you are recommended to bring her to Jazz Club on Jan.29th to learn “Spell Master” passive.
- Noir: Her “Cool Customer” trait can significantly reduce the probability of being inflicted with ailments. Lavenza deals ailments a lot, so reducing ailments helps a lot.
P4G: Margaret
To fight Margaret, you must fulfill the following conditions:
- This must be NG+ playthrough.
- Complete Empress Social Link.
- Defeat all optional bosses in all dungeons. Just make sure you have cleared every floor in your first run on the dungeon.
- Choose the True Ending (Find Izanami) on Mar.20th, 2012.
- After Igor gives you “Orb of Sight”, return to Velvet Room again to meet Margaret.
- Go to the 10F of Heaven dungeon to meet Margaret and fight her.
You can fight Margaret in the same fashion to Reaper. Similar to Reaper, she is immune to Light and Dark attacks at all times. However, because she can swap Personas, her affinity can change over time. She is explicitly resistant to Almighty attacks, so do not use All-Out Attacks even if you managed to knock her down with Critical Hits.
- The Protagonist will be Secondary DPS and Primary Supporter. He should use “Matarukaja” to raise all allies’ attack and use “Debilitate” to reduce stats of Margaret. You need to maintain your buff and debuff throughout the fight. If you have free turns to deal damage, it’s strongly recommended to use “Power Charge” and Yoshitsune’s “Hassou Tobi” skill.
- Chie Satonaka will be your Primary DPS. She should use “Power Charge” and “God’s Hand” to deal colossal damage.
- Yukiko Amagi will be your Secondary DPS and Healer. She should use “Mind Charge” and “Burning Petal” to deal colossal damage. She should guard herself or heal your teammates if Margaret can resist Fire attacks.
- Kanji Tatsumi will be your Secondary DPS and Supporter. He should use “Power Charge” and “Primal Force” to deal severe damage. If team ATK-up buff accidentally expired, let him refill the buff with “Matarukaja”.
- You must evolve Rise Kujikawa’s Persona into Kouzeon. This Persona can reveal all affinity at all times so that you can know Margaret’s element affinities.
There is no traps which Margaret will end the fight like the Twins and Lavenza would. In other words, she is probably the easiest ultimate boss in Persona series.
P3RE: Elizabeth
To fight Elizabeth, you need to receive the 101st quest: “Defeat the Ultimate Adversary” after Jan.6th, 2010. NG+ is not required, so you can fight her in your first playthrough, albeit it is virtually impossible to win. The deadline of this quest is Jan.31st, 2010. After you received this quest, enter the final room in the Monad Passage alone. In other words, your only teammate is your navigator: Fuuka Yamagishi.
Elizabeth has specific traps. If you didn’t manage to circumvent it, she will use Diarahan to completely heal herself and use Megidolaon which deals 9999 damage on you. When that happens, she will nullify all elements.
- Do not nullify, repel or drain her attack.
- Omnipotent Orb is prohibited.
- Tetrakarn and Makarakarn are prohibited.
- Equipping a Persona that can nullify, repel or drain some elements is fine. Just make sure her attacks aren’t nullified, repelled or drained.
- Do not use Armageddon Theurgy unless it’s the final blow. She has 20000 HP, so a single 9999 damage is not enough to kill her. Note that buffs do not affect the damage of Armageddon.
- Defeat her before 50 turns elapsed.
Elizabeth always attack in order, so you can predict her move and use a proper Persona without falling into the trap.
You are strongly recommended to visit the fortune teller in Escapade and ask for “Soul Fortune” so that you will charge Theurgy quickly.
The normal guide for Elizabeth fight is still work-in-progress. You can check the “One-Shot Kill” guide.
One-Shot Kill Elizabeth
Some players figured out a way to one-shot kill Elizabeth. This requires building DLC Personas properly.
The Persona we will use is Goemon (This Persona has unique passive skill “Ice Driver”):
- Give Goemon “Ice Boost”, “Ice Amp”, “Ice Driver”, “Magic Ability”, “Single-Target Boost” and “Multi-Target Boost” passive skills.
- Give Goemon 99 Ma stats.
- Enter Peaceful difficulty. This is required to one-shot kill Elizabeth.
You might be able to receive “Magic Mastery” skill from Skill Mutation. This is very rare but might possibly allow you to one-shot kill Elizabeth on other difficulties.
Fully charge Fuuka’s and your Theurgy before the fight. You need to load a proper Startup Persona in order to buff your ATK/DEF/AGI before the fight so that Fuuka’s Theurgy will definitely Charge and Concentrate you.
Once you entered the fight, use Fuuka’s Theurgy to Charge and Concentrate your next attack. Then use “Debilitate” to reduce Elizabeth’s stats.
In your next turn, use your Theurgy “King and I”. This should deal more than 20000 damage on Elizabeth. This is lethal enough to kill Elizabeth.
P3RE: Joker
To fight Joker, you need to enter the deepest part of Monad Passage in Episode Aigis. Unlike Elizabeth, you can bring your teammates with you to fight Joker. Similar to Elizabeth, you need to follow rules. Otherwise, Joker will switch to Satanael and spam Sinful Shell on your team to deal 9999 damage. Losing to Joker is considered a Game Over.
- Do not nullify, repel or drain his attacks.
- Omnipotent Orb is prohibited.
- Your teammates can nullify Joker’s attacks.
- Equipping a Persona that can nullify, repel or drain some elements is fine. Just make sure Aigis won’t nullify, repel or drain Joker’s attack.
- Tetrakarn and Makarakarn are prohibited.
- Do not use Armageddon Theurgy unless it’s the final blow. He has 30000 HP, so a single 9999 damage is not enough to kill him. Note that buffs do not affect the damage of Armageddon.
- Defeat him before 20 rounds of turns elapsed.
- Do not use Charge or Concentrate on your first turn.
Joker has two moves per turn. Once his HP is reduced to half, he will use “Will of Rebellion” and he can use three moves per turn onwards. He also abuses Dekaja and Heat Riser, making him tough and hard to hit.
The guide for Joker fight is currently work-in-progress.
P3P: Elizabeth/Theodore
To fight Elizabeth or Theodore, you need to receive the 55th quest “Defeat the Ultimate Opponent” after Jan.1st, 2010. NG+ is not required, so you can fight them in your first playthrough. The deadline of this quest is Jan.31st, 2010. After you received the quest, enter the top floor of Monad alone. Please note that there are no duplex portals in P3P Monad, so you need to climb the floors on your own. You can disassemble the team once you talk to Elizabeth/Theodore, so you can simply let your teammates spread out to find stairs for you so that you can climb faster.
Although I will use “they/them/their/theirs/themselves” in the following paragraphs, you will only fight either Elizabeth or Theodore. You won’t fight both of them simultaneously.
They have specific traps. If you didn’t manage to circumvent it, they will use Diarahan to completely heal themselves and use Megidolaon which deals 9999 damage on you. When that happens, she will nullify all elements.
- Do not nullify, repel or drain their attacks. Also note that:
- Counter, Counterstrike and High Counter passive skills are fine.
- Infinity Fusion Spell is fine.
- Equipping a Persona that can nullify, repel or drain some elements is fine. Just make sure their attacks aren’t nullified, repelled or drained.
- Omnipotent Orb is prohibited.
- Tetrakarn and Makarakarn are prohibited.
- Do not use Armageddon Fusion Spell unless it’s the final blow. They have 20000 HP, so a single 9999 damage is not enough to kill them. In other words, only use Armageddon when they have only 9999 HP or less. Note that buffs and debuffs do not affect the damage of Armageddon.
- Unlike P3RE, it seems there is no turn limits.
They always attack in the following order, so you can predict their moves and use a proper Persona without falling into the trap:
- Surt/Uriel: They will use Fire or physical attacks.
- Jack Frost/Gabriel: They will use Ice or physical attacks.
- Thor/Michael: They will use Electricity or physical attacks.
- Cu Chulainn/Raphael: They will use Wind or physical attacks.
- Metatron/Sandalphon: They will use Light or physical attacks.
- Alice/Lilith: They will use Dark or physical attacks.
- Nebiros/Abaddon: They will use Ailment or physical attacks.
- Masakado/Beelzebub: They will use Megidolaon to deal 9999 almighty damage.
- Pixie/Beelzebub: They will use Diarahan to fully heal themselves then use Megidolaon to deal 9999 almighty damage. This is used only when you fell into the trap. Note that Theodore using Beelzebub doesn’t mean you fell into the trap. Check if he is using Diarahan and Megidolaon.
This order is cycled. Thus, you can predict what is their next move any time. Note that they might use physical attacks twice in their turn.
I recommend you prepare following Personas:
- Surt: This Persona deals Fire damage. Make sure it has following skills:
- Ragnarok: Deal severe Fire damage.
- Fire Boost: Boost Fire damage by 25%.
- Fire Amp: Amplify Fire damage by 50%.
- Spell Master: Reduce SP cost.
- Resist Elec: You will use this Persona after they used Jack Frost/Gabriel. Therefore, they will use Thor/Michael, which deal Electricity damage, in next turn.
- Null Shock: Electricity skills can inflict Shock ailment on you.
- Scathach: This Persona deals Ice and/or Wind damage. Make sure it has following skills:
- Niflheim: Deal severe Ice damage. There is no skill card for Niflheim.
- Panta Rhei: Deal severe Wind damage. There is no skill card for Panta Rhei.
- Ice Boost: Boost Ice damage by 25%. Required if only you built Scathach with Niflheim.
- Ice Amp: Amplify Fire damage by 50%. Required if only you built Scathach with Niflheim.
- Wind Boost: Boost Wind damage by 25%. Required if only you built Scathach with Panta Rhei.
- Wind Amp: Amplify Wind damage by 50%. Required if only you built Scathach with Panta Rhei.
- Spell Master: Reduce SP cost.
- You will use this Persona after they use Surt/Uriel and Thor/Michael. Therefore, they will use Jack Frost/Gabriel and Cu Chulainn/Raphael, which deal Ice and Wind damage, in next turn. Scathach has innate Ice and Wind resistances, so you don’t need to give her Resist Ice/Wind passive skills.
- You don’t need this Persona in Theodore fight if she has neither Niflheim nor Panta Rhei.
- Null Freeze: Ice skills can inflict Ice ailment on you. Required if you managed to build Scathach with Niflheim.
- Skadi, which has Innate Niflheim skill, cannot be used because she can absorb Ice, which will be used by them in the next turn.
- Norn, which has Innate Panta Rhei skill, cannot be used because she can absorb Wind, which will be used by them in the next turn.
- Odin: This Persona deals Electricity damage. Make sure it has following skills:
- Thunder Reign: Deal severe Electricity damage.
- Elec Boost: Boost Electricity damage by 25%.
- Elec Amp: Amplify Electricity damage by 50%.
- Spell Master: Reduce SP cost.
- Resist Light: You will use this Persona after they used Cu Chulainn/Rapahel. Therefore, they will use Metatron/Sandalphon, which deal Light insta-kill, in next turn.
- Orpheus Telos: This Persona can resist all elements. You will not fall into any traps with this Persona.
- Pralaya: Deal severe Pierce damage with high critical rate. Use this skill if you are in Good condition.
- Vorpal Blade: Deal heavy Slash damage with doubled damage if you are in Great condition.
- Weary Thrust: Deal heavy Strike damage with more damage if you are in Tired condition.
- Apt Pupil: Doubles critical rate.
- Arms Master: Reduce HP cost.
- Unshaken Will: You will use this Persona after they use Alice/Lilith. Therefore, they will use Nebiros/Abaddon, in the next turn. This passive skill can protect user from any ailments.
- Messiah: This Persona can resist Fire/Ice/Electricity/Wind. Only use this Persona if you cannot build Scathach with Niflheim/Panta Rhei.
- Mind Charge: Double the next magic skill.
- Power Charge: Double the next physical skill.
- Salvation: Recover full HP and cure all ailments.
- Diarahan: Recover full HP but do not cure ailments. Use this to reduce SP cost. (optional)
- Spell Master: Reduce SP cost by half.
- Null Freeze: Required if you didn’t manage to build Scathach with Niflheim.
- You will use this Persona if you didn’t manage to build Scathach with Niflheim or Panta Rhei. Use Mind Charge to boost your power or Diarahan to heal yourself.
- You are strongly recommended to put “Regenerate 3” and “Invigorate 3” on all Personas.
- Try to raise St, Ma and Ag stats to 99 for all Personas. This can be done by playing arcade games in the Paulownia Mall and use cards.
I recommend you prepare the following items and equipments:
- Prepare 1 Armageddon Fusion Spell. You can buy it from Shinshodo Antique shop with 99 Malachites and 10 Rubies. This is used for the final blow.
- Prepare sufficient Infinity Fusion Spells. This is used to block their Megidolaon skills. I recommend you to prepare at least 10 of them.
- Prepare sufficient Soma medicines. This will restore full HP and SP. Use it only when both HP and SP are low. I recommend you to prepare at least 3 of them.
- Prepare sufficient Homunculus. You can only resist Light and Dark, so it’s still possible that you will be hit by insta-kill moves. I recommend you to prepare at least 20 of them.
- Craft Lucifer’s Blade for Protagonist or Vel Vel Muruga for Female Protagonist.
- These two weapons can grant +10 for all stats.
- Lucifer’s Blade can be crafted by giving Lucifer Persona to Shinshodo antique shop.
- Vel Vel Muruga can be crafted by giving Kartikeya Persona to Shinshodo antique shop.
- Obtain Armor of Light and Shoes of Light. They can be obtained by Heart Item from leveling up Messiah.
- Obtain Barbaric Bracers: It can be obtained by Heart Item from leveling up Chi You. This will increase your chance to dodge attacks.
- Prepare a calculator in the real world. You will need to use it to check if you can use Armageddon.
- Reach Level 99. Reaching Level 99 will grant you 999 HP and 999 SP. This can reduce healing turns throughout the battle. You can efficiently farm EXP in Monad alone.
Battle Walkthrough
Follow this order:
- Turn 1: they will use Surt/Uriel, use either Scathach if she has Niflheim or Messiah if otherwise.
- Turn 2: they will use Jack Frost/Gabriel, use Surt with Ragnarok skill.
- Turn 3: they will use Thor/Michael, use either Scathach if she has Panta Rhei or Messiah if otherwise.
- Turn 4: they will use Cu Chulainn/Raphael, use Odin with Thunder Reign skill.
- Turn 5: they will use Metatron/Sandalphon, use Orpheus Telos with Pralaya/Vorpal Blade/Weary Thrust skill.
- Turn 6: They will use Alice/Lilith, use Orpheus Telos with Pralaya/Vorpal Blade/Weary Thrust skill.
- Turn 7: They will use Nebiros/Abaddon, equip any Personas, but use Infinity Fusion Spell.
- Turn 8: They will use Masakado/Beelzebub, use Messiah to either heal or charge.
Once you managed to deal 10000 HP damage, they will use Diarahan to completely heal themselves. And the cycle will resume. After the heal, use your calculator to accumulate all damage you have dealt. Once you have dealt 10001 HP damage or more, use Armageddon fusion spell immediately in order to claim your victory.
They have Almighty resistances, so it is very inefficient use Almighty skills on them.
P5R Challenge Battles
In P5R, there are challenge battles which give pretty good rewards base on your score. The higher score you’ve got, the more reward you will earn. There are three rewards per battle. You need to reach required scores in order to get them. The reward is once-only and you can’t earn them again even if you are in a new playthrough. Keep this in mind because some rewards are treasures and they can’t be carried over to NG+, so you should sell them or they are lost for naught.
This guide will only talk about the Full Moon and Foggy Day since they are the hardest and the most special.
In Challenge Battles, the order of turns are based by story order instead of agility. So Joker always goes first and Violet always goes last.
It is strongly recommended to switch to Merciless difficulty for Challenge Battles. It’s because Technical damage increases as the difficulty increases.
After fighting Challenge Battles, your team will recover HP/SP to previous state. However, the items you have used will not be recovered. So use your items wisely. Try to let your teammates wear certain accessories and use skills instead.
Full Moon
In Full Moon Challenge Battle, you will fight Makoto Yuki (a.k.a. S.E.E.S. Boy, the P3 Protagonist). In both Level 50 and Level ??? difficulties, bonus score requirements are the same:
- +25,000 / +150,000 points if you can clear the battle in 20 actions.
- Attacking with Bless will multiply the score by five.
- Attacking by Mona will multiply the score by four.
- Attacking by Joker on the final blow will multiply the score by ten.
You will earn the following rewards:
| Score Points | Difficulty | Reward | Effect |
| 25,000 | Level 50 | Treasure: Silver Moon | Can be sold in Untouchable for 200,000 Yen. |
| 50,000 | Level 50 | Skill Card: Endure | Survive a fatal blow with 1HP remaining. |
| 60,000 | Level 50 | Accessory: Ardhanari Band | Grants wearer “Blazing Hell” skill to deal severe Fire damage on all foes. |
| 150,000 | Level ??? | Treasure: Gold Moon | Can be sold in Untouchable for 1,000,000 Yen. |
| 250,000 | Level ??? | Skill Card: Drain Fire | Recover HP from incoming Fire damage. |
| 360,000 | Level ??? | Accessory: Magic Misanga | Grants wearer “Spell Master” skill to reduce any Magic skill SP cost by half. |
Recommended Personas for Joker:
- Startup Persona: This Persona should have “Auto-Mataru”, “Auto-Maraku”, “Auto-Masuku” passives and “Will of the Sword” trait so that all allies will have Heat Riser effect and Joker is Concentrated.
- Supporter Persona: This Persona is intended to inflict buff on the team and debuff on S.E.E.S. Boy.
- Neo Cadenza / Heat Riser: Deal Heat Riser effect on at least Joker.
- Debilitate: Reduce all stats on S.E.E.S. Boy.
- Wealth of Lotus: This trait will extend the buff by two turns.
- Concentrate: Next magic skill will deal 2.5x damage.
- Ailment Persona: This Persona is intended to inflict ailment on S.E.E.S. Boy.
- Marin Karin / Brain Jack: Inflict Brainwash on S.E.E.S. Boy.
- Brainwash Boost & Ailment Boost: Further boost the success rate to deal Brainwash.
- Ambient Aid & Gloomy Child: This pair of passive and trait can further boost the success rate of ailments.
- Kaguya (Picaro): This Persona is intended to deal Bless damage on S.E.E.S. Boy.
- Shining Arrow: This skill deals light Bless damages on all foes for 4-8 times.
- Makougaon: This skill deals heavy Bless damage on all foes for once.
- Magic Ability, Bless Boost, Bless Amp: These passives will amplify Bless damage to the 2.0x cap.
- Mighty Gaze: This trait will further amplify multi-target skills by 20%.
- Null/Repel/Drain Fire: S.E.E.S. Boy can use “Blazing Hell” skill to deal Fire damage.
Recommended Team:
- If you brought all above Personas, you can fight S.E.E.S. Boy on solo. The purpose of bringing your teammate is to deal buff and debuff efficiently.
- Mona: Must wear accessories that use “(Ma)Kougaon” in order to deal Bless damage in order to exploit both score multiplier.
- Crow: Reach at least Level 70 in order to learn “Debilitate” skill or bring enough “Ultimate Spray” items.
- Bring enough “Star Onion” items or equip your teammate with “Ring of Greed” so that you can concentrate Joker.
Battle Walkthrough:
- In the first turn, put the S.E.E.S. Boy on Brainwash and cast Debilitate on him.
- In the second turn, let Mona use “(Ma)Kougaon” to knock him down and pass the baton to Joker to use “Shining Arrows” to deal an amplified huge amount of Bless damage. If you are lucky, you should be able to make S.E.E.S. Boy activate Endure.
- Once S.E.E.S. Boy activated Endure, you should use “Makougaon” instead of “Shining Arrow” because the multi-hit skills do not deal any damages once the foe is dying.
- You should use “Makougaon” to finish him off after he activated “Endure” and when he uses Thanatos and casts “Maeigaon”. That’s when he is weak against Bless so your damage is increased without dealing Technical hits.
Foggy Day
In Foggy Day Challenge Battle, you will fight Yu Narukami (a.k.a. Investigation Team Boy, the P4 Protagonist). In both Level 50 and Level ??? difficulties, bonus score requirements are the same:
- +300,000 / +999,999 points if you can clear the battle in 24 turns.
- Attacking with Physical Skills will multiply the score by five.
- Dealing Technical Hits will multiply the score by seven.
- Attacking by Noir will multiply the score by four.
- Attacking by Joker on the final blow will multiply the score by ten.
You will earn the following rewards:
| Score Points | Difficulty | Reward | Effect |
| 300,000 | Level 50 | Treasure: Silver Mist | Can be sold in Untouchable for 200,000 Yen. |
| 800,000 | Level 50 | Skill Card: Ali Dance | Foes’ accuracy is reduced by half. |
| 1,200,000 | Level 50 | Accessory: Thunder Charm | Grants wearer “Wild Thunder” skill to deal severe Electricity damage on all foes. |
| 1,000,000 | Level ??? | Treasure: Gold Mist | Can be sold in Untouchable for 1,000,000 Yen. |
| 1,700,000 | Level ??? | Skill Card: Drain Elec | Recover HP from incoming Electricity damage. |
| 2,500,000 | Level ??? | Accessory: Bravery Sash | Grant wearer “Arms Master” skill to reduce any Physical skill HP cost by half. |
Recommended Personas for Joker:
- Startup Persona: This Persona should have “Auto-Mataru”, “Auto-Maraku”, “Auto-Masuku” passives and “Will of the Sword” trait so that all allies will have Heat Riser effect and Joker is Concentrated.
- Supporter Persona: This Persona is intended to inflict buff on the team and debuff on S.E.E.S. Boy.
- Neo Cadenza: Deal Heat Riser effect on all allies.
- Debilitate: Reduce all stats on Investigation Team Boy.
- Wealth of Lotus: This trait will extend the buff by two turns.
- Concentrate: Next magic skill will deal 2.5x damage.
- Ailment Persona: This Persona is intended to inflict ailment on Investigation Team Boy. You can choose Rage Technician Method or Physical Technician Method, but keeping one is enough.
- Taunt / Wage War: Inflict Rage on Investigation Team Boy. (Rage Technician Method)
- Thunder Reign / Wild Thunder: Inflict Shock on Investigation Team Boy. (Physical Technician Method)
- Shock Boost / Rage Boost & Ailment Boost: Further boost the success rate to deal ailments.
- Ambient Aid & Gloomy Child: This pair of passive and trait can further boost the success rate of ailments. Ambient Aid can significantly boost ailment chance in bad weather and Gloomy Child trait can enable bad-weather-only skills to activate in any circumstances.
- Kohryu: This Persona is intended to deal Technical Hits on Investigation Team Boy.
- Psycho Force: This skill deals severe Psychokinesis damage on 1 foe.
- Magic Ability, Psy Boost, Psy Amp: These passives will amplify Psychokinesis damage to the 2.0x cap.
- Universal Law: This trait will further amplify Technical Hit damage by 50%.
- Ariadne (Picaro): This Persona is intended to deal Physical Technical Hits on Investigation Team Boy.
- Beast Weaver: This is the unique, strongest Physical Skill in the game, but it’s also exclusive to Ariadne (Picaro).
- Don’t amplify critical rate (e.g.: “Apt Pupil”) because Technical and Critical can’t stack together.
- Universal Law: This trait will amplify Technical Hit damage by 50%, much better than “Undying Fury”, which only amplifies damage by 30%.
Recommended Team:
- Noir: She will be the Technical Hitter and will take advantage of character’s exclusive score multiplier.
Make sure she has “Psy Boost” and “Psy Amp” passives and wear “Dragon’s Heart” accessory to use “Psycho Force”, or simply use “(Ma)Psiodyne”. (Rage Technician Method)
Wear “God’s Hand Belt” to use “God’s Hand” and deal Colossal Physical Damage. (Physical Technician Method) - Skull: His “Eccentric Temper” trait can sometimes amplify physical skill damage by 80% for all allies. You may equip Izanagi (Picaro) on Joker because the unique trait “God Maker” can boost the chance for allies’ trait to activate. (Physical Technician Method Only)
His “Fighting Spirit” skill can charge everyone in one turn. - Queen: Her “Gaia Blessing” trait can further boost the chance to inflict Shock. (Physical Technician Method Only)
Her “Checkmate” skill can decrease all stats, albeit it’s an expensive skill and it’s somewhat extravagant to just use on only one foe. (For any methods) - Bring enough “Star Onion” items or equip your teammate with “Ring of Greed” so that you can concentrate Joker and Noir.
- Bring enough “Earth Bean” items or equip your teammate with “Ring of Pride” so that you can charge everyone.
- Bring enough Stun Gun / Shock Matagama to inflict shock if you don’t have a specialized Persona to deal Shock.
Battle Walkthrough (Rage Technician Method):
- This method does not consider using Physical-Skill score multiplier, but I still managed to earn all rewards in this way.
- In the first turn, cast Rage ailment and buff/debuff. Make sure Joker and Noir are concentrated.
- In the second turn, let Noir use (Ma)Psiodyne skill to deal Technical hit on Investigation Team Boy then pass the baton to Joker to deal Technical Hit again with Psycho Force.
- Noir may deal roughly 9400 damage on Level ??? with Merciless difficulty. With score multiplier (28x), this should give roughly 260K score.
- After passing the baton to Joker, he may deal roughly 40K damage (more than double of full HP) on Level ??? with Merciless difficulty. With score multiplier (70x), this should give roughly 2.8M score.
This hit alone has already surpassed the third-tier reward score requirement.. - Note that the Rage ailment persists even being hit once.
Battle Walkthrough (Physical Technician Method):
- Yoshitsune is not recommended because his signature move “Hassou Tobi” deals light damage per hit. The game will stop counting damage once your enemy reaches 0 HP, so multi-hit light-damage skill is in fact less ideal than single-hit colossal-damage skill.
Use Ariadne (Picaro) instead. Build her as described above. - Put Queen on the team because Agnes’ unique trait “Gaia Blessing” can further boost the chance to inflict shock.
- In the first turn, inflict shock on the Investigation Team Boy. This is your priority because most of his Personas are immune to Electricity. Then cast debuff on him and Charge on team.
- In the second turn, let Noir use “God’s Hand” (Accessory skill) to deal Technical Hit (due to shock) then pass the baton to Joker and use “Beast Weaver” skill to deal Technical Hit again.
- If your luck is good, you can finish this fight in one turn.
If you have properly built your Ailment Persona, you should be able to inflict Shock on him in one turn. - Noir can deal roughly 5500 damage on Level ??? with Merciless difficulty. With score multiplier, that would be 770K points.
If “Eccentric Temper” is activated, she can deal roughly 10K damage. With score multiplier, that would be 1.4M points. - After passing the baton to Joker, he may deal roughly 27K damage (much more than full HP) on Level ??? with Merciless difficulty. With score multiplier (350x), that would be 9.4M points. In sum, this has already exceeded 10M score record cap.
- If your luck is terrible, Critical can replace Technical and multiplier due to Technical is omitted.
- Note that the Shock ailment persists even being hit once.